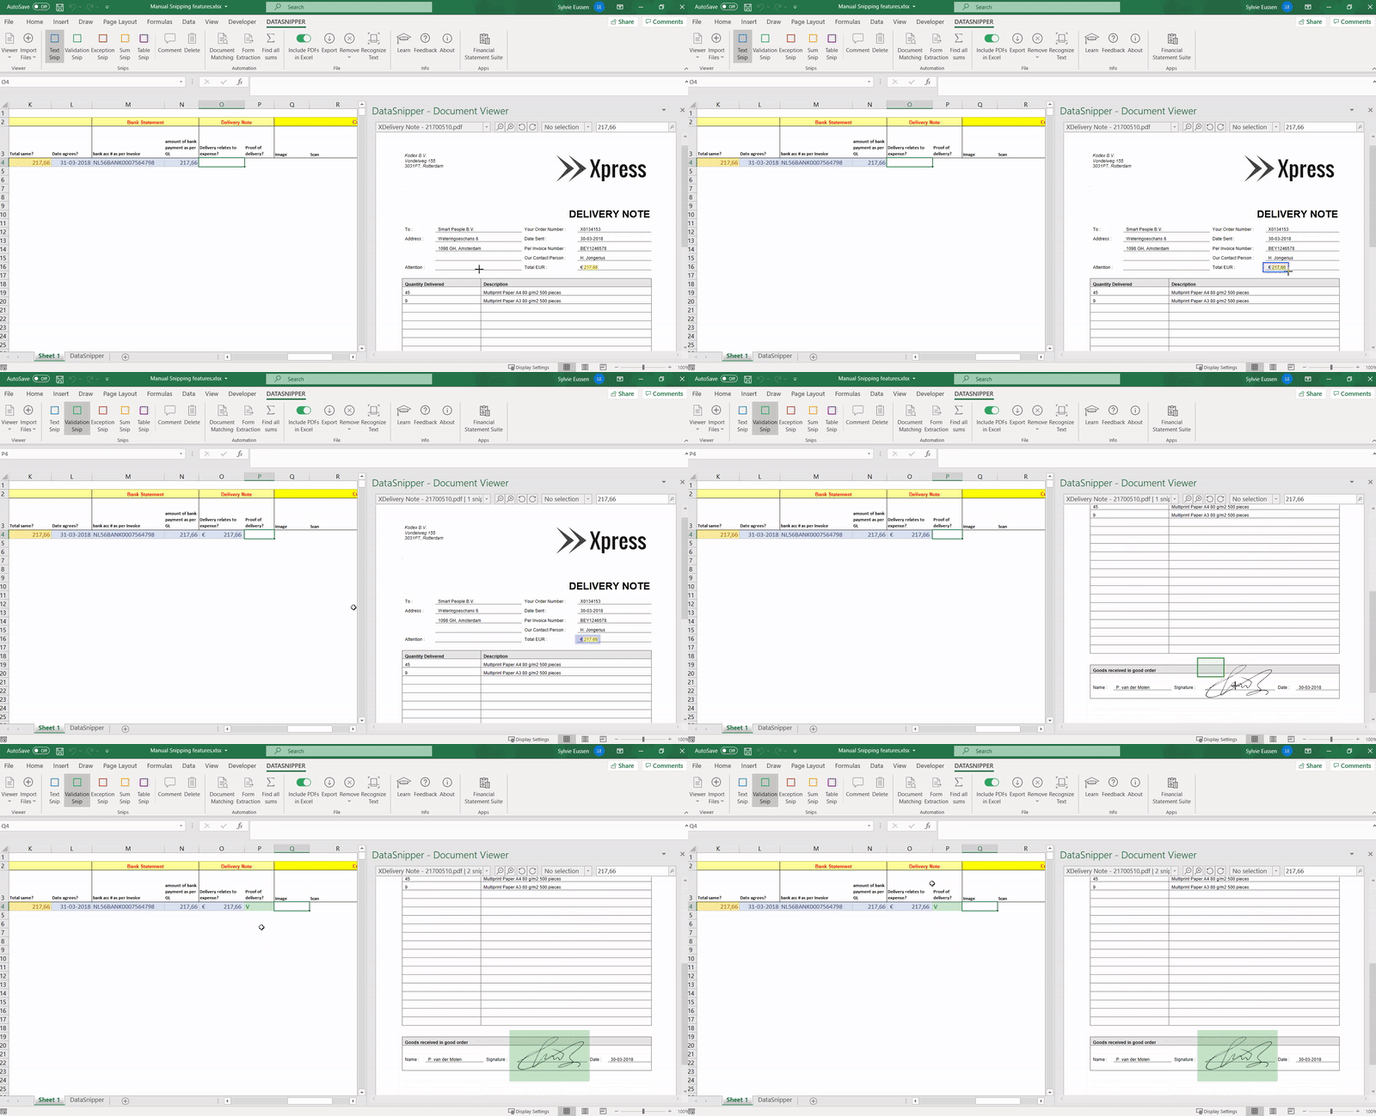
How to add a Validation Snip to a document
With the Validation Snip, you can indicate that data in a document is correct according to your personal judgment.
About Snipping
With DataSnipper you can cross-reference Excel with supporting evidence, like PDFs, images, MS Word and Excel files. The references are stored in the workbook. This makes it very easy to review audit procedures.
Setting a Validation Sanip
- Click the Validation Snip button into active mode
- Select the cell that you want to link to the PDF
- Drag a rectangle around the relevant location on the PDF
- The tick mark that appears in the cell is now linked to the rectangle on the PDF

Use the Validation Snip for all kinds of audit procedures, such as minute reviews, checklists, tests of detail, walkthroughs, test of controls and contract reviews.
FAQs
- Can you edit the tick mark entered in Excel when you use the Validation Snip?
When creating a Validation Snip, by default a green 'V' will be entered in the Excel worksheet. It is currently not possible to change the default tick mark. After you have created the Snip you can change the content of the cell, its color, font, and font size and this should not impact the link between the cell and the snip on the linked document.
Note that when you change a Text Snip to a Validation Snip, the content of the cell remains the same but the font and cell color will change.
You can also use the “Find and Replace” functionality in Excel to automatically replace all Validation Snip contents at once.