Which version are you installing?
| Version 26 and later | Version 25 and earlier | |
|---|---|---|
| License method | Server-side authentication (in-product login) | Local license key file (license.txt) |
| What you need | The .msi installer (e.g. datasnipper-core-auto-stable-v26.1.21.msi) |
The .zip package containing Setup.msi + license.txt |
| Installer delivery | Downloads directly as a standalone .msi file |
Delivered as a .zip archive that must be extracted first |
| LICENSEKEY= parameter | Not required | Required |
| Financial Statement Suite | Separate installer (same process, different .msi) |
Included in the .zip package or separate installer |
Not sure which version you have? If your installation package is a .zip file containing a license.txt, you're on version 25 or earlier. If you received a standalone .msi file with no license file, you're on version 26+.
Prerequisites
- You have your DataSnipper
Setup.msiinstaller file (provided by your DataSnipper contact). - For version 25 and earlier only: you also have the
license.txtfile included in your installation package. msiexec.exeis available on your Windows machine (included with Windows by default).
Please refer to this article: How to install DataSnipper for single-use
System Requirements
| Resource | Minimum | Recommended |
|---|---|---|
| RAM | 16 GB minimum | 32 GB recommended |
| Processor | 2.5 GHz | 2.5 GHz or higher |
| Storage | 1 GB free | 1 GB free |
| OS | Windows | Windows |
| Excel | Microsoft Excel 2010 or later | Microsoft Excel 2010 or later |
File path length limit: 260 characters (versions older than v6) or 400 characters (v6.1 and later). Read more here.
Administrator Privileges
Running the installer in silent/quiet mode (/quiet) typically requires administrator privileges. If you encounter "access denied" errors, make sure you are running Command Prompt or PowerShell as Administrator (right-click > "Run as administrator").
Version 26 and Later
Version 26 uses server-side authentication. Users log in through DataSnipper after installation, so there is no license key to embed during install. This makes deployment significantly simpler.
The v26 installer downloads directly as a standalone .msi file (e.g. datasnipper-core-auto-stable-v26.1.21.msi). There is no .zip archive to extract.
Financial Statement Suite (FSS): In v26, FSS has its own separate installer. The installation process is the same as below, just use the FSS
.msifile instead.
Command Line Options
| Parameter | Required? | Description |
|---|---|---|
/i <path_to_Setup.msi> |
Yes | Tells msiexec to install DataSnipper |
/quiet |
Optional | Runs the installer silently (no UI, no prompts) |
APPDIR=<path> |
Optional | Custom installation directory. Use quotes if the path contains spaces: APPDIR="C:\Program Files\" |
/L*V <path_to_log> |
Optional | Creates a verbose log file for troubleshooting |
/x <path_to_Setup.msi> |
Uninstall | Uninstalls DataSnipper |
/f <path_to_Setup.msi> |
Repair | Repairs the DataSnipper installation |
Installation Steps
- Locate the
.msifile. For manual installs, it will typically be in your Downloads folder (e.g.C:\Users\YourName\Downloads\datasnipper-core-auto-stable-v26.1.21.msi). For SCCM/Intune deployments, place it on an accessible network share. - Open Command Prompt or PowerShell as Administrator (required for
/quietmode). Navigate to the folder containing the.msifile:
cd C:\Users\YourName\Downloads
Run the install command:
Common error: If you run the command from a different directory without specifying the full path to the .msi file, you will get "This installation package could not be opened." Either cd to the folder first or use the full file path in the command.
3. Run the install command:
msiexec.exe /i "datasnipper-core-auto-stable-v26.1.21.msi" /quiet
Or using the full path without changing directory:
msiexec.exe /i "C:\Users\YourName\Downloads\datasnipper-core-auto-stable-v26.1.21.msi" /quiet
Or with a custom install directory and logging:
msiexec.exe /i "datasnipper-core-auto-stable-v26.1.21.msi" /quiet APPDIR="C:\Program Files\DataSnipper" /L*V "C:\Logs\datasnipper_install.log"4. Open Microsoft Excel. DataSnipper should appear in the Excel ribbon.
5. First launch: each user will be prompted to log in to DataSnipper with their organization credentials. This is a one-time step that authenticates the user against your organization's server-side license. No manual license file is needed.
Tip for IT teams: Since authentication happens in-product on first launch, you can push the MSI silently via Intune, SCCM, or Group Policy without needing to distribute or manage license files. Users handle the login step themselves.
Version 25 and Earlier
These versions use a local license key that must be embedded during installation. Without it, DataSnipper will show a "missing/expired license" error.
Important: Read all steps fully before executing. If the license key is not included in the install command, DataSnipper will not function correctly.
Extract the Installation Package First
Version 25 and earlier installers are delivered as a .zip archive. You must extract (unzip) the contents before running the installer. Right-click the .zip file and select "Extract All..." or use your preferred extraction tool. Running the .msi directly from inside the .zip (without extracting) will fail.
After extraction, you should have at least:
Setup.msi(the installer)license.txt(your license key)
Your License key
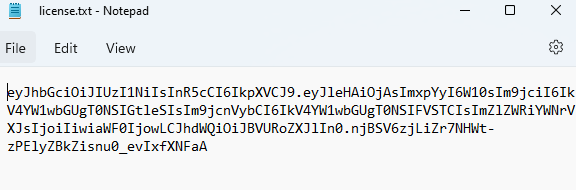
Your license key is in the license.txt file included in your installation package (provided by your DataSnipper contact). It is a long string of characters containing your organization's license information. The full, exact contents of license.txt must be used. Partial or modified strings will be invalid.
Command line install options
| /i | Required, tells msiexec to install DataSnipper. |
| /x | Optional: used instead of /i to uninstall DataSnipper |
| /f | Optional: used instead of /i to repair the DataSnipper installation |
| /quiet |
Optional: The installer will run without displaying a user interface. No prompts, messages, or dialog boxes will display to the user. The user cannot cancel the installation. |
| APPDIR= |
Optional: Can be used to specify the installation directory. If the installation directory has spaces in it, use quotation marks: APPDIR="C:\Program Files\" |
| LICENSEKEY= | Required, please paste your license key after the = sign in this command. Anything but the full contents of license.txt will be invalid. |
| /L*V <path_to_log> | Optional: Can be used to create a log file in case of issues during the installation |
Installing DataSnipper via Command Line
- Extract the
.zippackage (see above). Make sure the files are fully extracted to a folder on disk, not opened directly from the.zip. - Open
license.txtand copy the entire string of characters. This is your license key. - Open Command Prompt or PowerShell as Administrator (required for
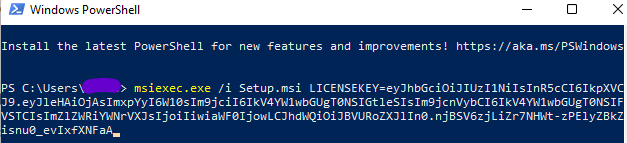
/quietmode). Navigate to the folder containing the extracted files: - Run the install command, pasting your license key after the
=sign:msiexec.exe /i "Setup.msi" /quiet LICENSEKEY=<paste_your_license_key_here>
Or using the full path without changing directory:
msiexec.exe /i "C:\Users\YourName\Downloads\DataSnipper_v25.2.18\Setup.msi" /quiet LICENSEKEY=<paste_your_license_key_here>
- Follow the setup steps as normal. If you used
/quiet, the installation will complete silently. - Open Microsoft Excel. DataSnipper should appear in the Excel ribbon. Click Import Documents to verify the installation is working correctly.
If DataSnipper does not appear, try enabling it in Excel's add-in settings or contact support.
Open Excel
Open Microsoft Excel, and DataSnipper should be visible in the Microsoft Excel Ribbon! Import any file by clicking Import Documents to verify a full installation.

If this is not the case, try enabling DataSnipper or contact support.