How to use Form Extraction
Learn how to use the 'Form Extraction' tool within DataSnipper to easily extract data from multiple documents with similar formatting and convert it into a data table which you can easily work with.
About Form Extraction
Use DataSnipper to extract relevant data from documents with the same layout. Simply Snip all data fields from one document and DataSnipper applies the same logic to other documents. It's like a robot that multiplies your efforts.
Choose your DataSnipper version to learn more about Form Extraction:
👉 DataSnipper version 4.0 and earlier
👉 DataSnipper version 4.1 and later
DataSnipper version 4.0 and earlier
Video tutorial
Prerequisites
- Similarly structured documents to extract data (e.g. sales invoices, contracts, tax forms)
- DataSnipper v4.0 and earlier
Start extracting
- Open the form extraction section by clicking on the form extraction button in the automation section of the DataSnipper Ribbon.
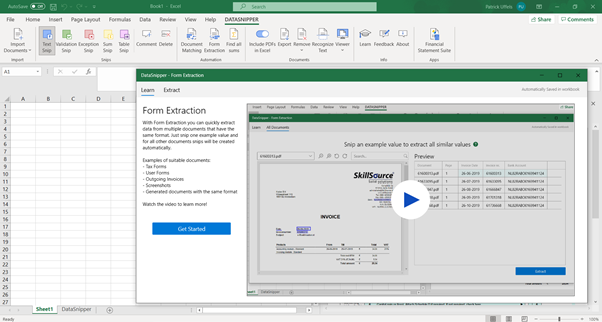
- Click on the 'Get Started' button under the explanation text.
- Once the document viewer and preview window load, you can tell DataSnipper where the data you want to extract is on the first document, simply click and drag over the area of the document which includes the data you would like to extract.
.gif?width=688&name=ezgif.com-gif-maker%20(15).gif)
- DataSnipper then loads a preview of the extracted data fields on the right-hand side of the screen.
- If you click the 'Extract' button then the data will be extracted into an excel workbook. You can then use this as a normal Excel data table.
.gif?width=688&name=ezgif.com-gif-maker%20(16).gif)
DataSnipper version 4.1 and later
What's new in version 4.1?
In version 4.1, Form Extraction includes saving your extractions as templates. The saved templates will be stored in your templates folder locally and can be used in the future. Additionally, you can edit extraction keys by using the snipping feature.
Video tutorial
Prerequisites
- Similarly structured documents to extract data (e.g. sales invoices, contracts, tax forms)
- DataSnipper v4.1 and later
Start extracting
- Open the form extraction section by clicking on the Form Extraction button in the DataSnipper Ribbon.
- You will see your templates folder as a start page. To start extracting click on Start new form extraction button.
- Import and/or select all the documents you want to use.
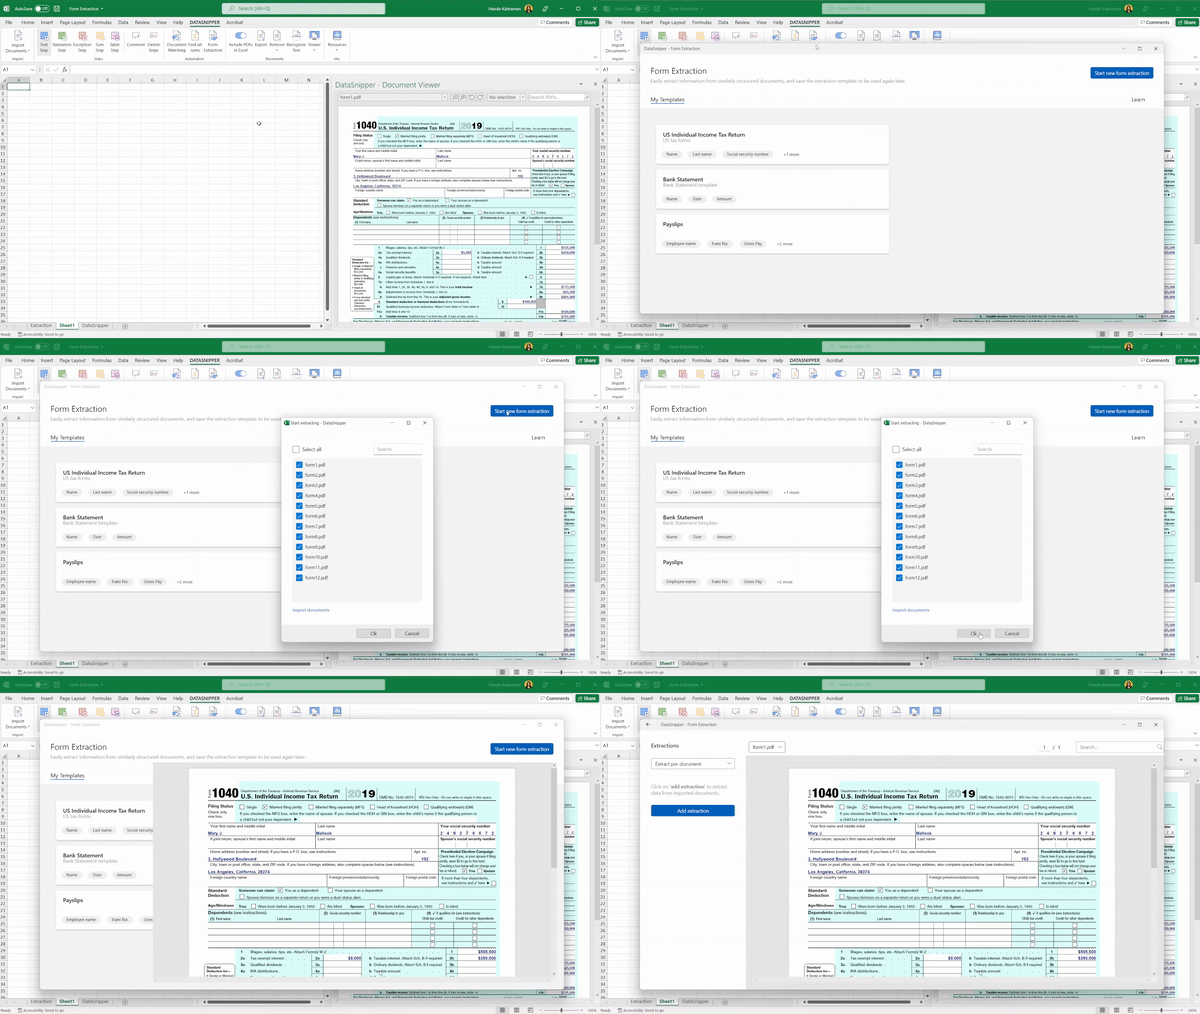
- Click on add extraction button to extract data from imported documents. Simply click and drag over the area of the document which includes the data you would like to extract.
- You can see the preview of the extracted data fields on the right-hand side of the screen.
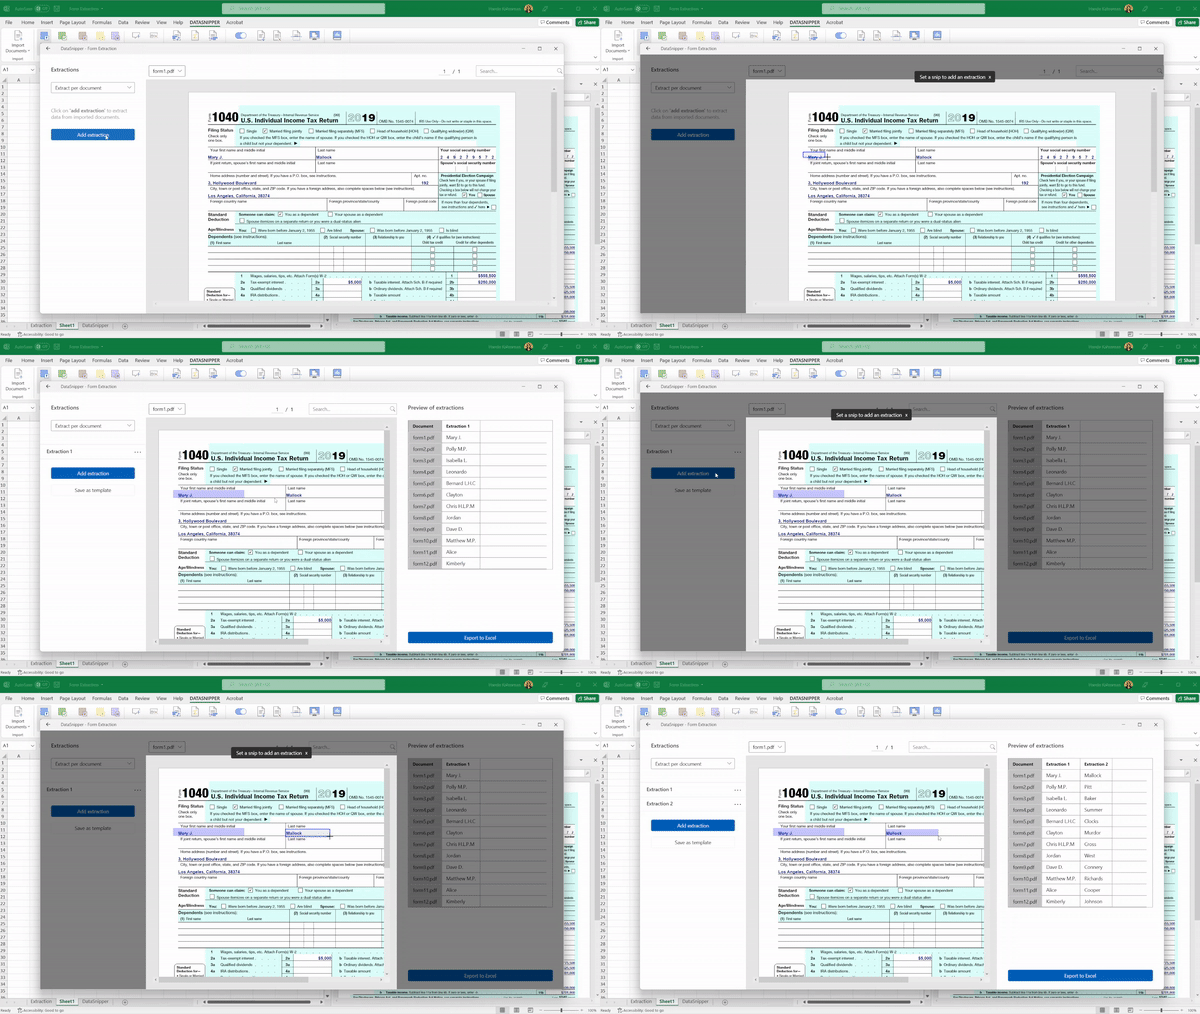
- If you want to edit, rename or delete your extraction, click on the three dots next to your extractions.
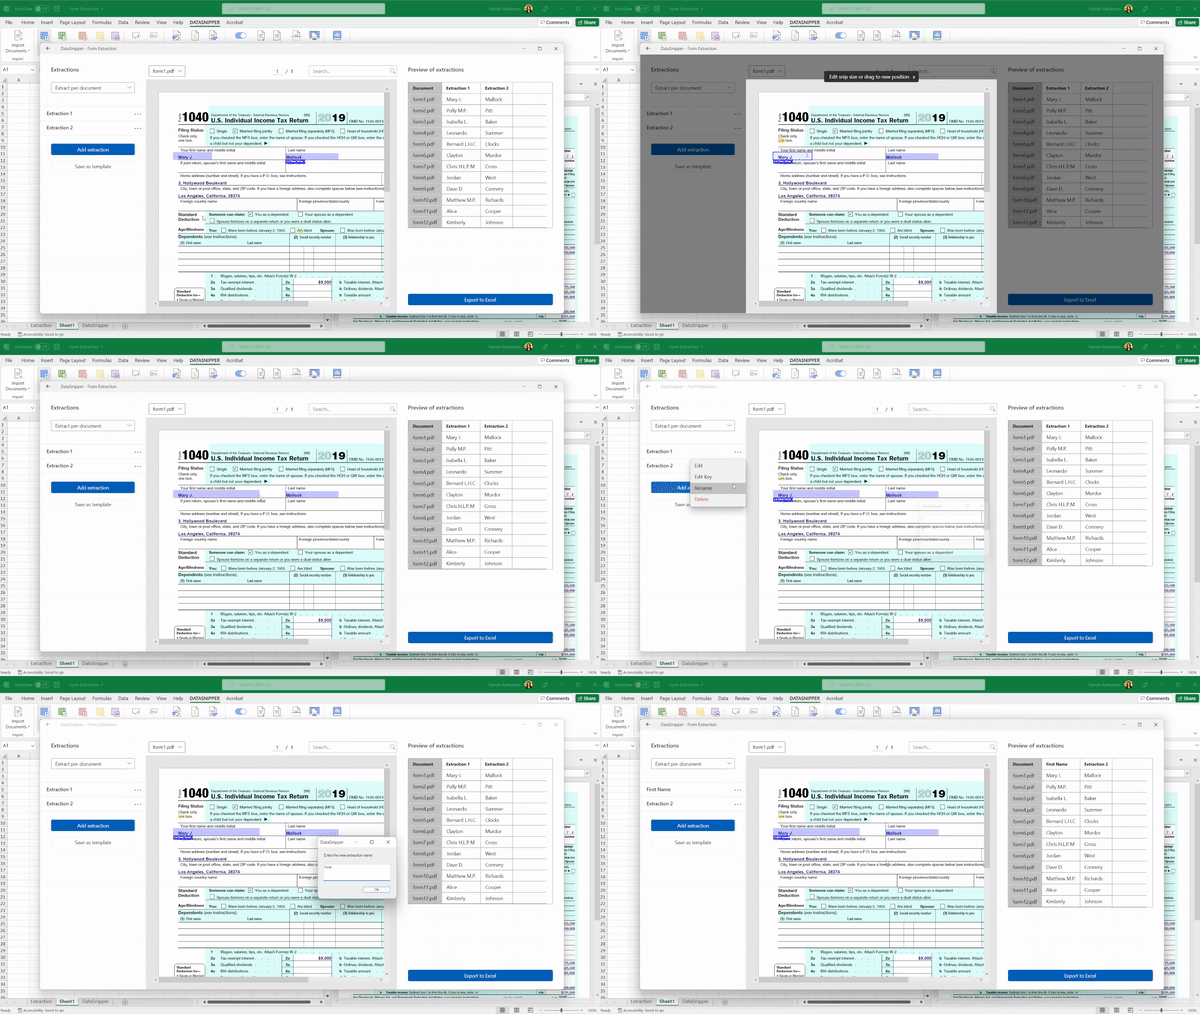
- Once you are done with extracting, you can save your work as a template by clicking save as template.
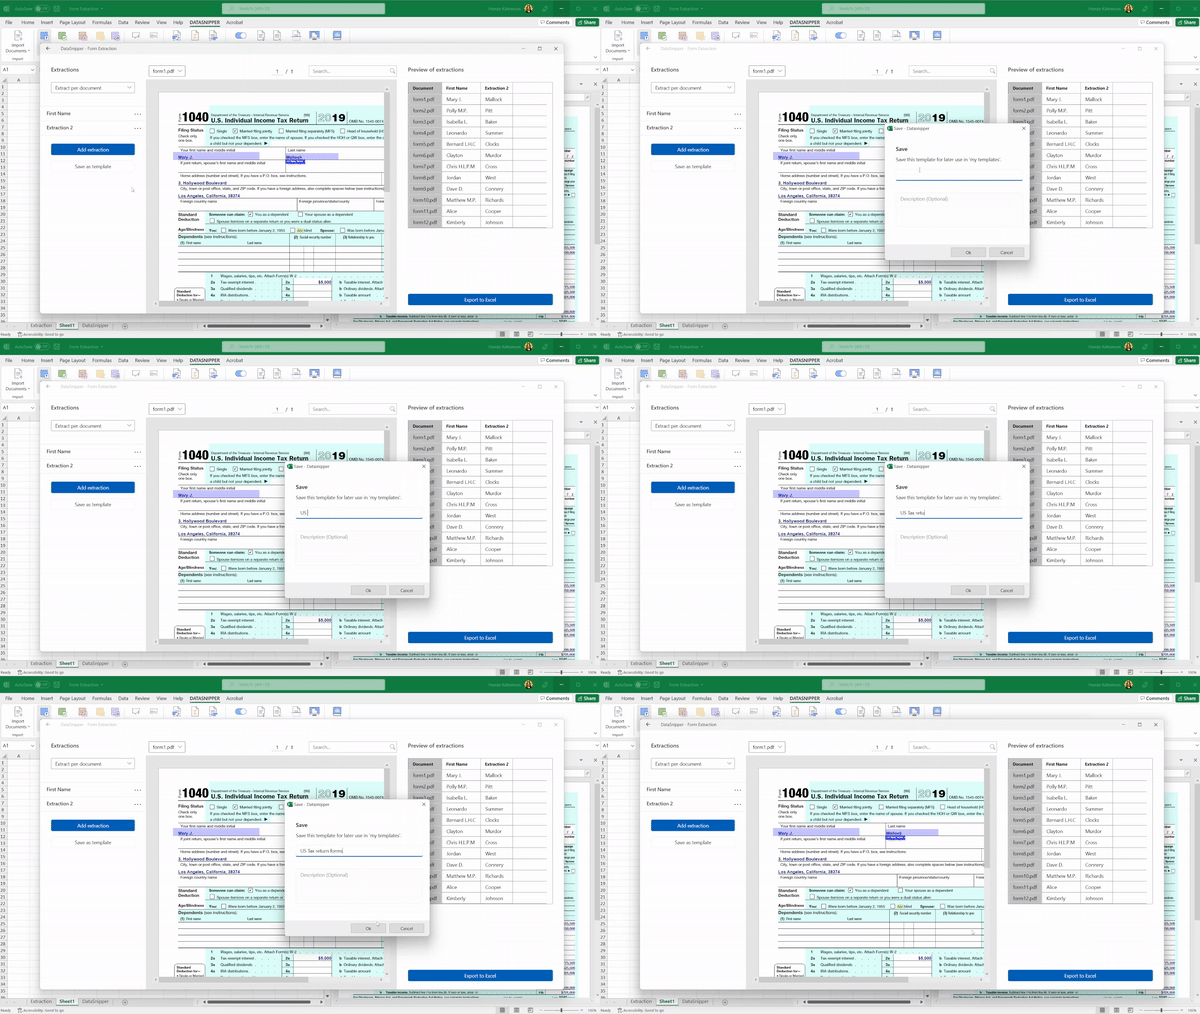
- Finally, click on Export to Excel and your extractions will appear on a new workbook.
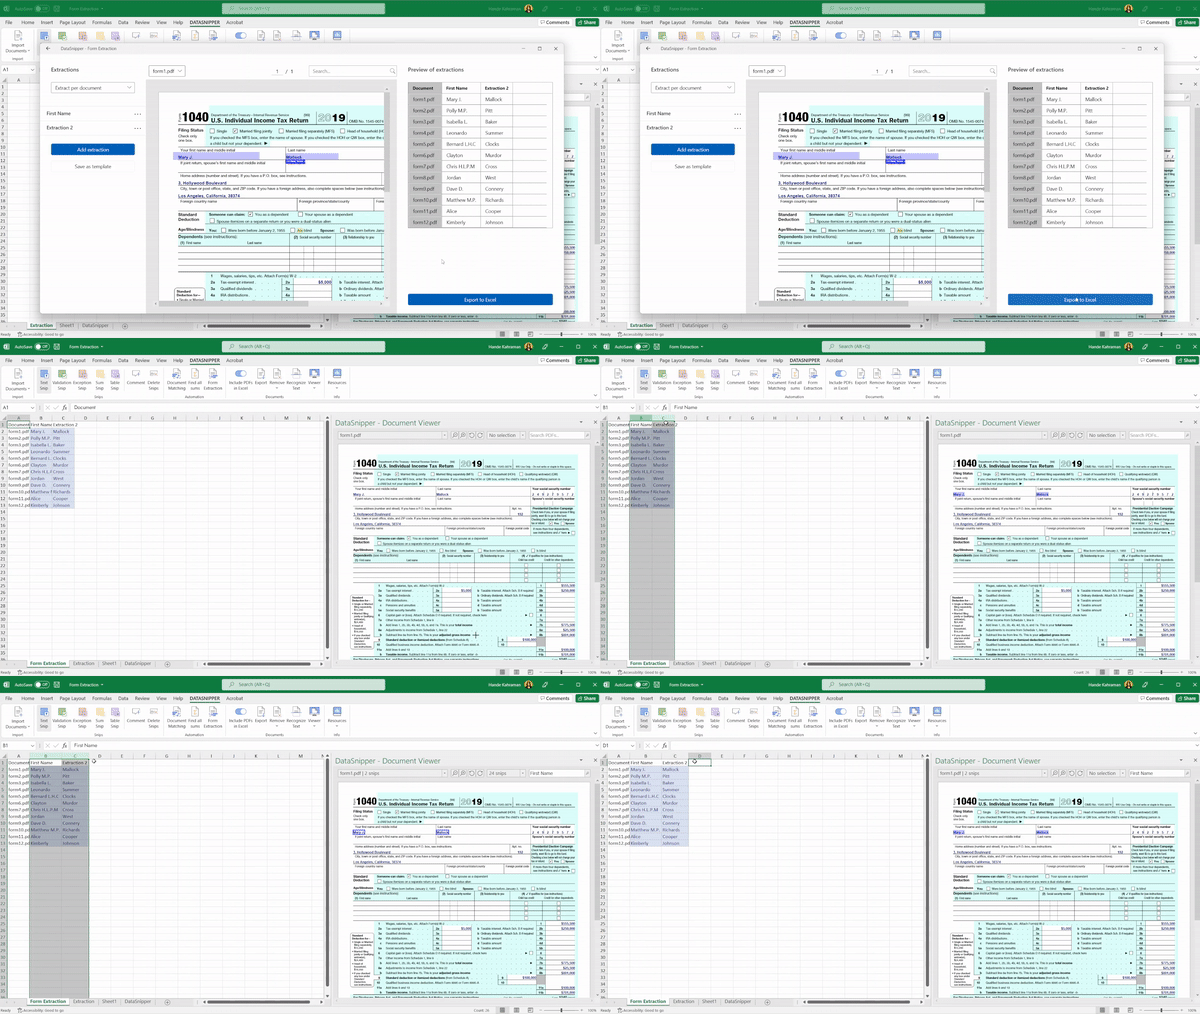
You can also edit keys to get more accurate results of your extractions. To learn more, read here.
⚠️ Saving templates is only available for DataSnipper version 4.1 and later. Please contact your Customer Success Manager to learn more about DS version 4.1.