Choose your DataSnipper version:
👉 DataSnipper version 4.1 and later
👉 DataSnipper version 4.0 and earlier
Video Tutorial
Example
Here you can download the workbook shown in the video including all of the sample data and documents.
Template
Here you can download a blank version of the workbook shown in the video to use or customise for your own procedures.
Prerequisites
- Payroll master data file from your client's HR system
- Pay slip run
- Screenshots or bank statement showing payroll payment
- Employee contracts
Start procedure
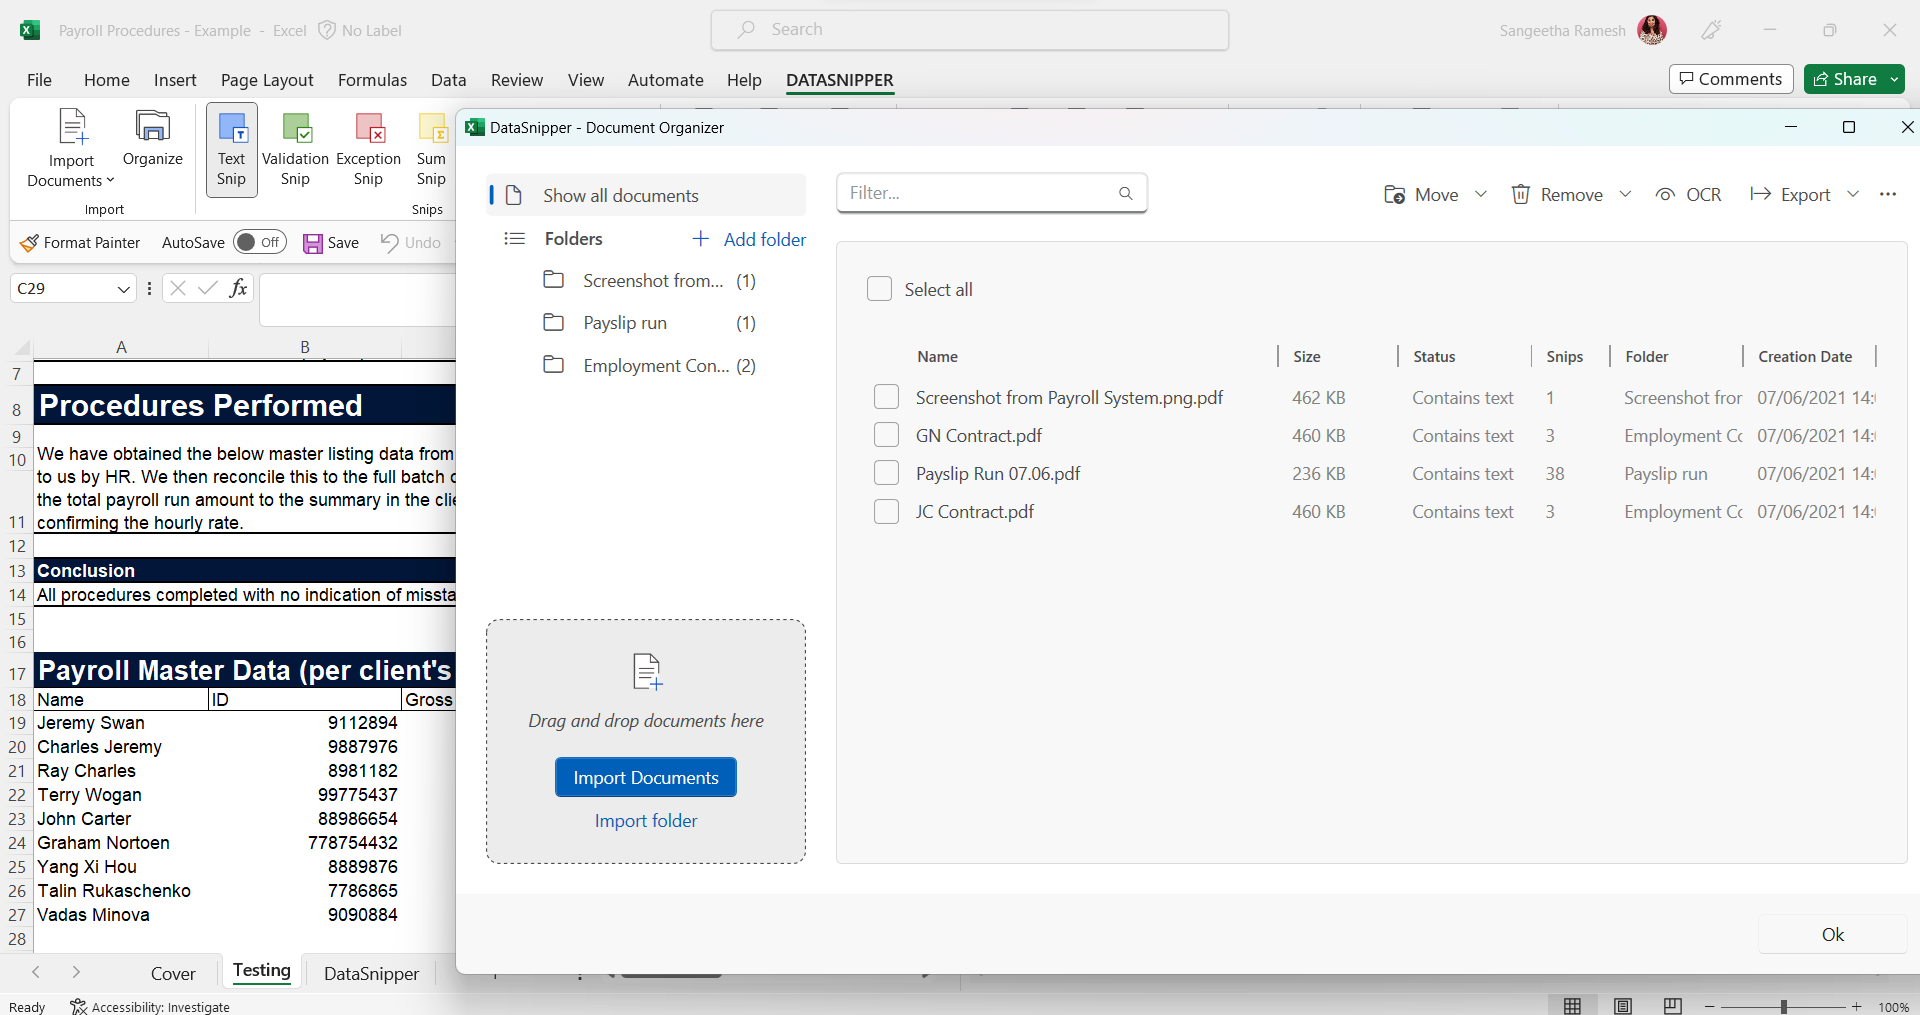
- Start by importing your supporting evidence including pay slips, employment contract and any other documents such as screenshots from the payroll system.
- Click on Document Organizer and create folders for each type of document.
- Click on Document Matching and “Start new Document Matching”.
- Select your sample data. If your sample data includes headers, check on the box "First row includes headers". Then, select “Use documents folders” & check the boxes of folders you would like to use.
- Next, cross check the output columns and adjust them according to your procedure. Click "Match all rows" and DataSnipper will automatically match the input and output columns for you.

- You can now calculate the total per the pay slip run by using the Sum Snip.
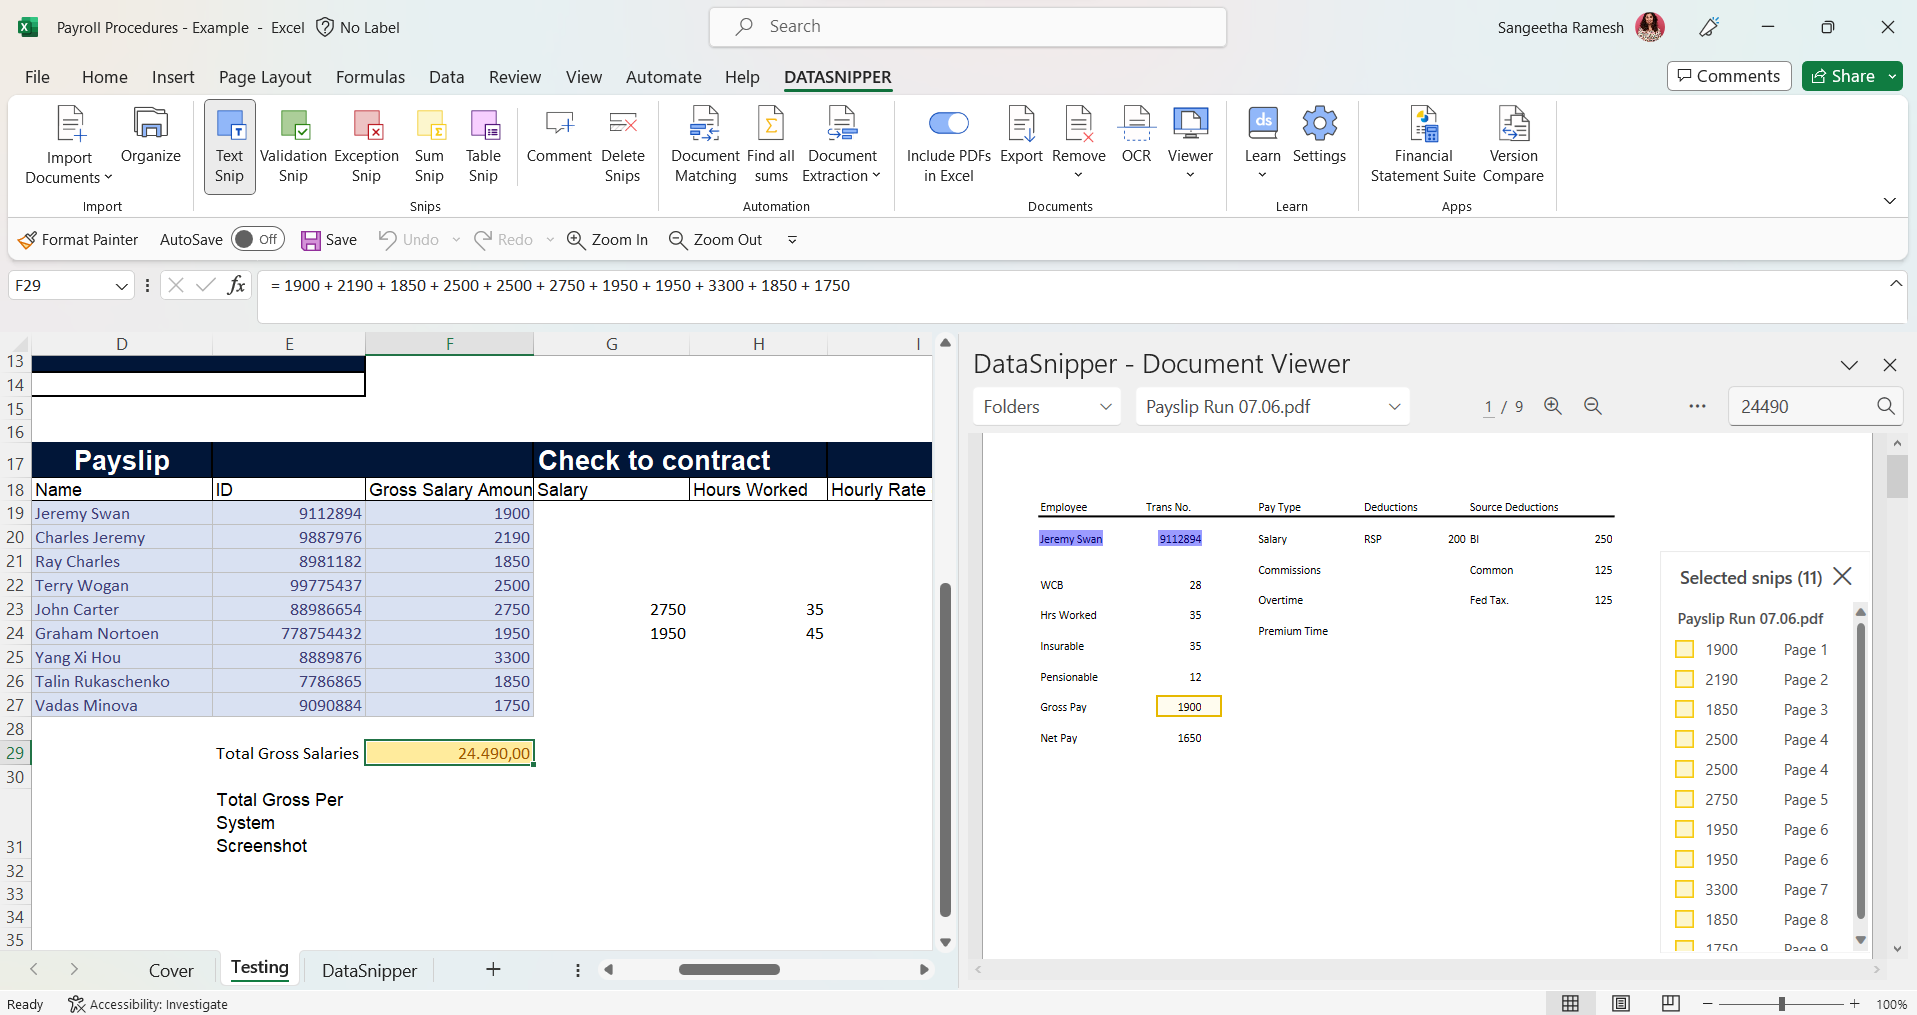
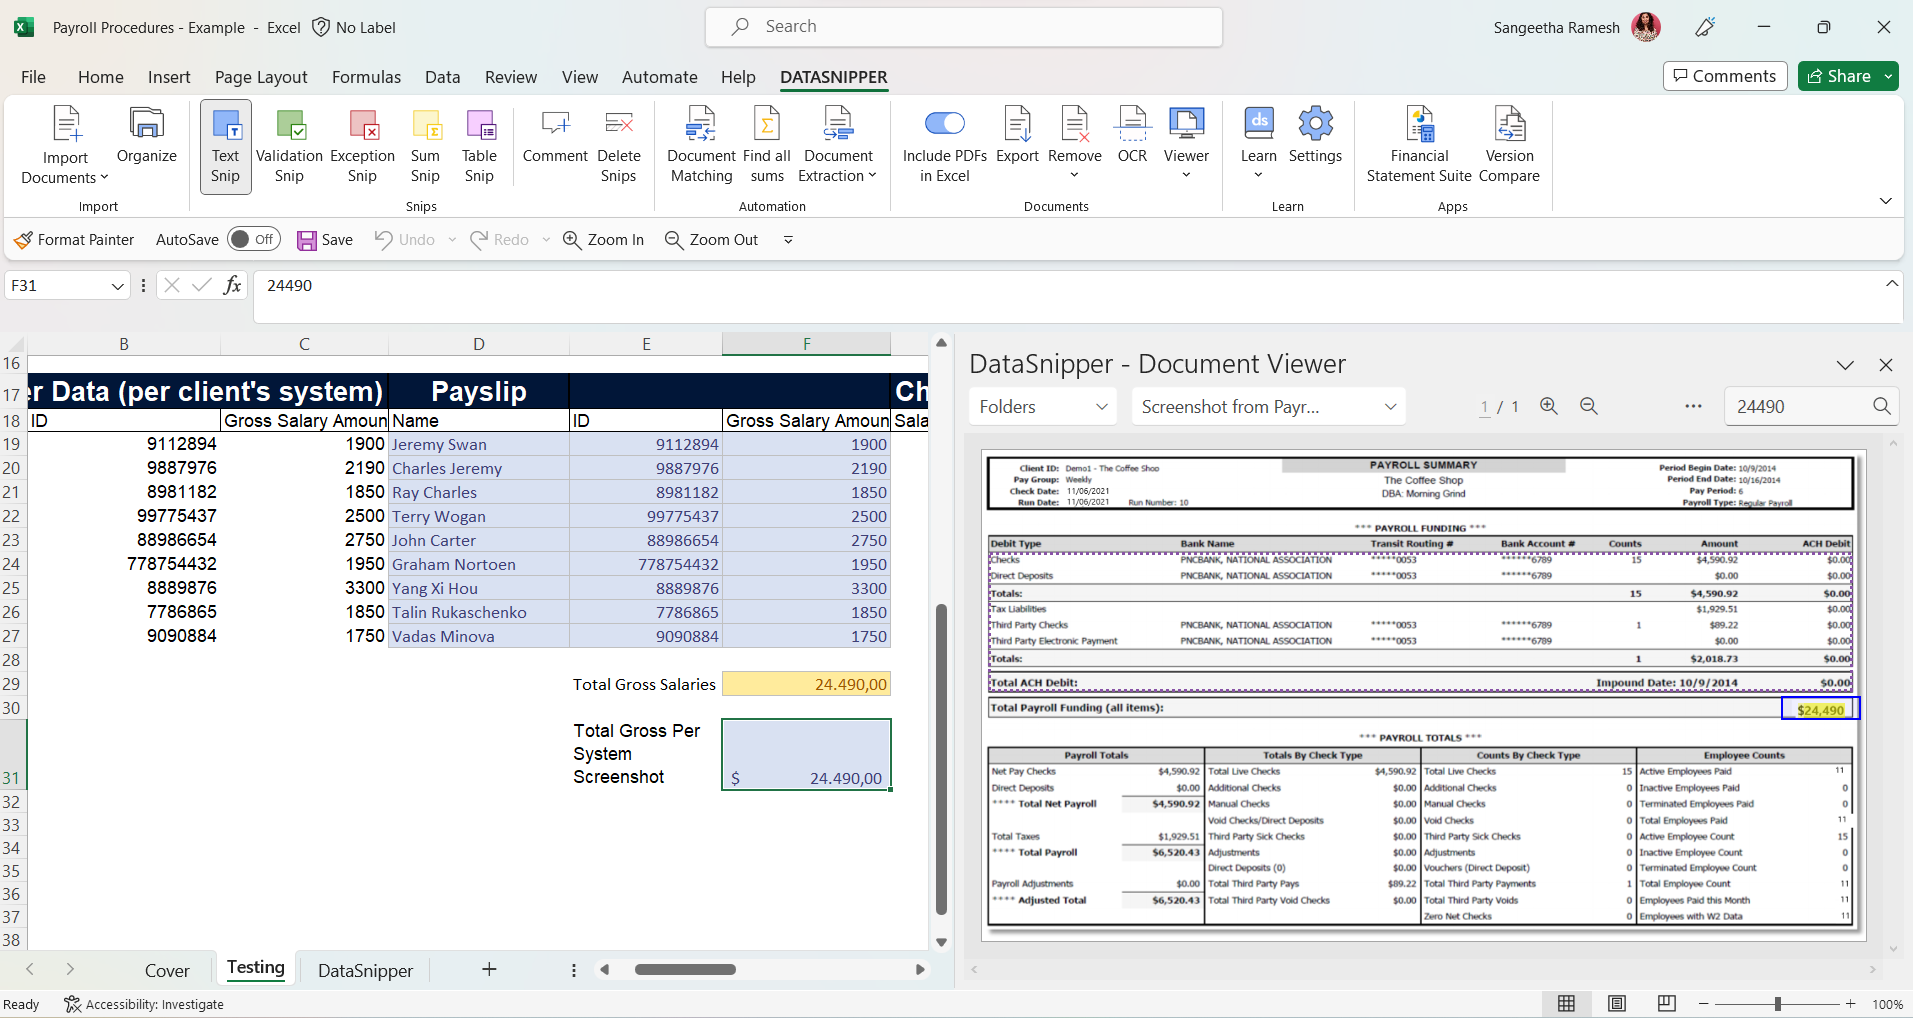
- Then tie this to the total per the system screenshot or bank statement by using the Text Snip.
- Reconcile the details to an individual employee contract by using the smart search functionality to find the correct contract per the employee's name or employee ID and use Text Snip to extract data from the contract or the Validation Snip to evidence signature of the contract.
DataSnipper version 4.0 and earlier
Sharing the file
- You can choose to exclude all documents before saving the workbook in your audit file, by selecting the include/exclude documents toggle.
- You have some options to delete specific documents, please click here to learn more.