How to extract tables from multiple pages
With 'Table snip for multiple pages' you can extract tabular data from multiple pages. This feature can be used for documents with multiple tables with a similar structure
Ready to Snip?
Join our community of 500.000+ audit and finance professionals already using DataSnipper during Busy Season. Start your 14-day trial now!
Choose your DataSnipper version to learn more about Table Snip:
👉 DataSnipper version 6.0 or later
OR
👉 Visit most FAQs on the Table Snip
DataSnipper version 6.0 and later
What's new in version 6.0?
In version 6.0, DataSnipper automatically provides a banner indicating all tables in the documents and the choice to snip these all at once into your workbook, regardless of the table layout. With a single click of a button, the tables are extracted into your Excel workbook. Using the indicators, you can seamlessly edit the columns and rows by simply dragging them to the desired location.
Video Tutorial
Table Snip in version 6.0
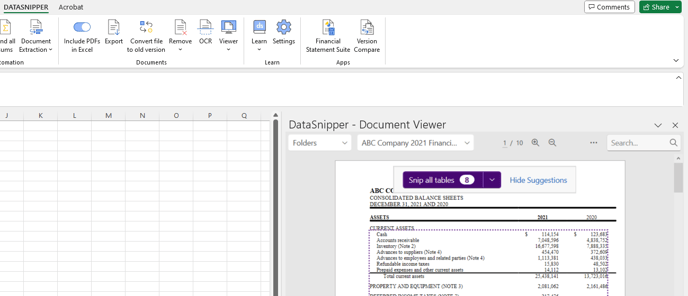
- A banner will appear on your Document Viewer to suggest "Snip all tables"
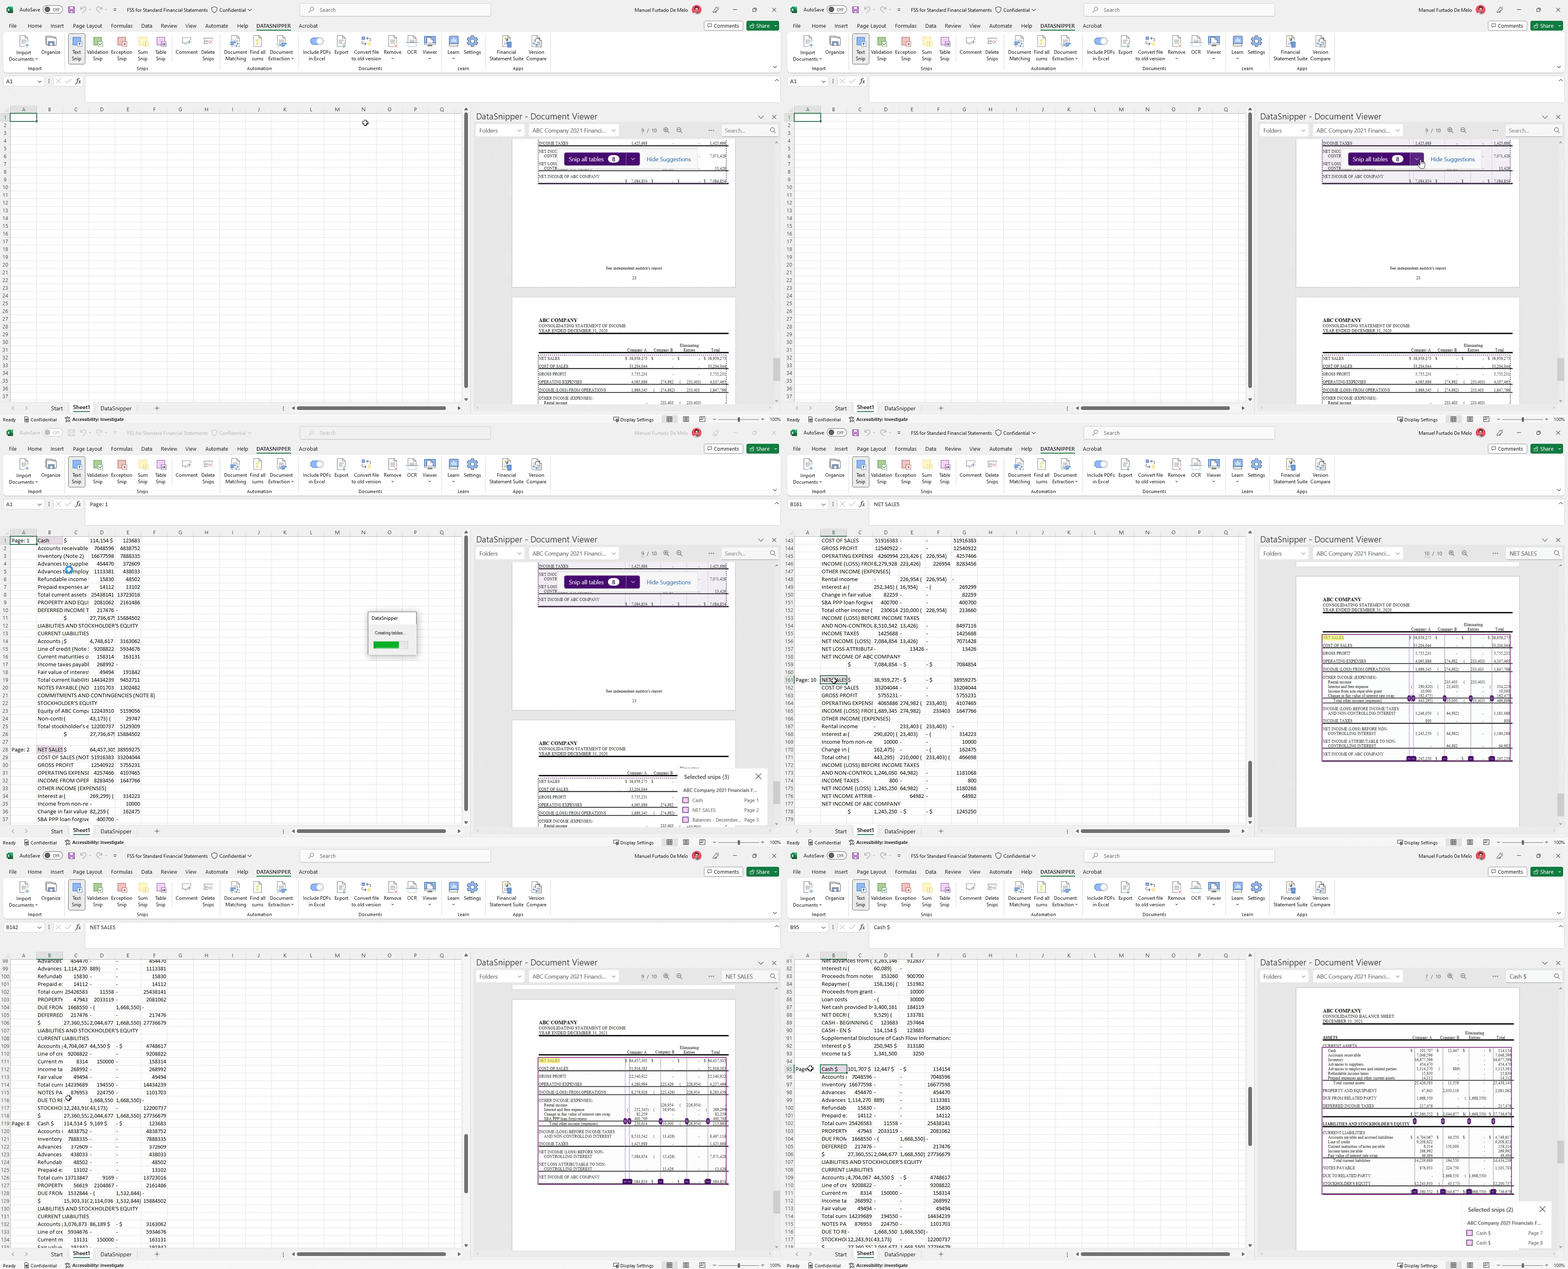
- With Version 6.0, you can now Snip all tables from all pages at once without concerns for different table layouts in different pages
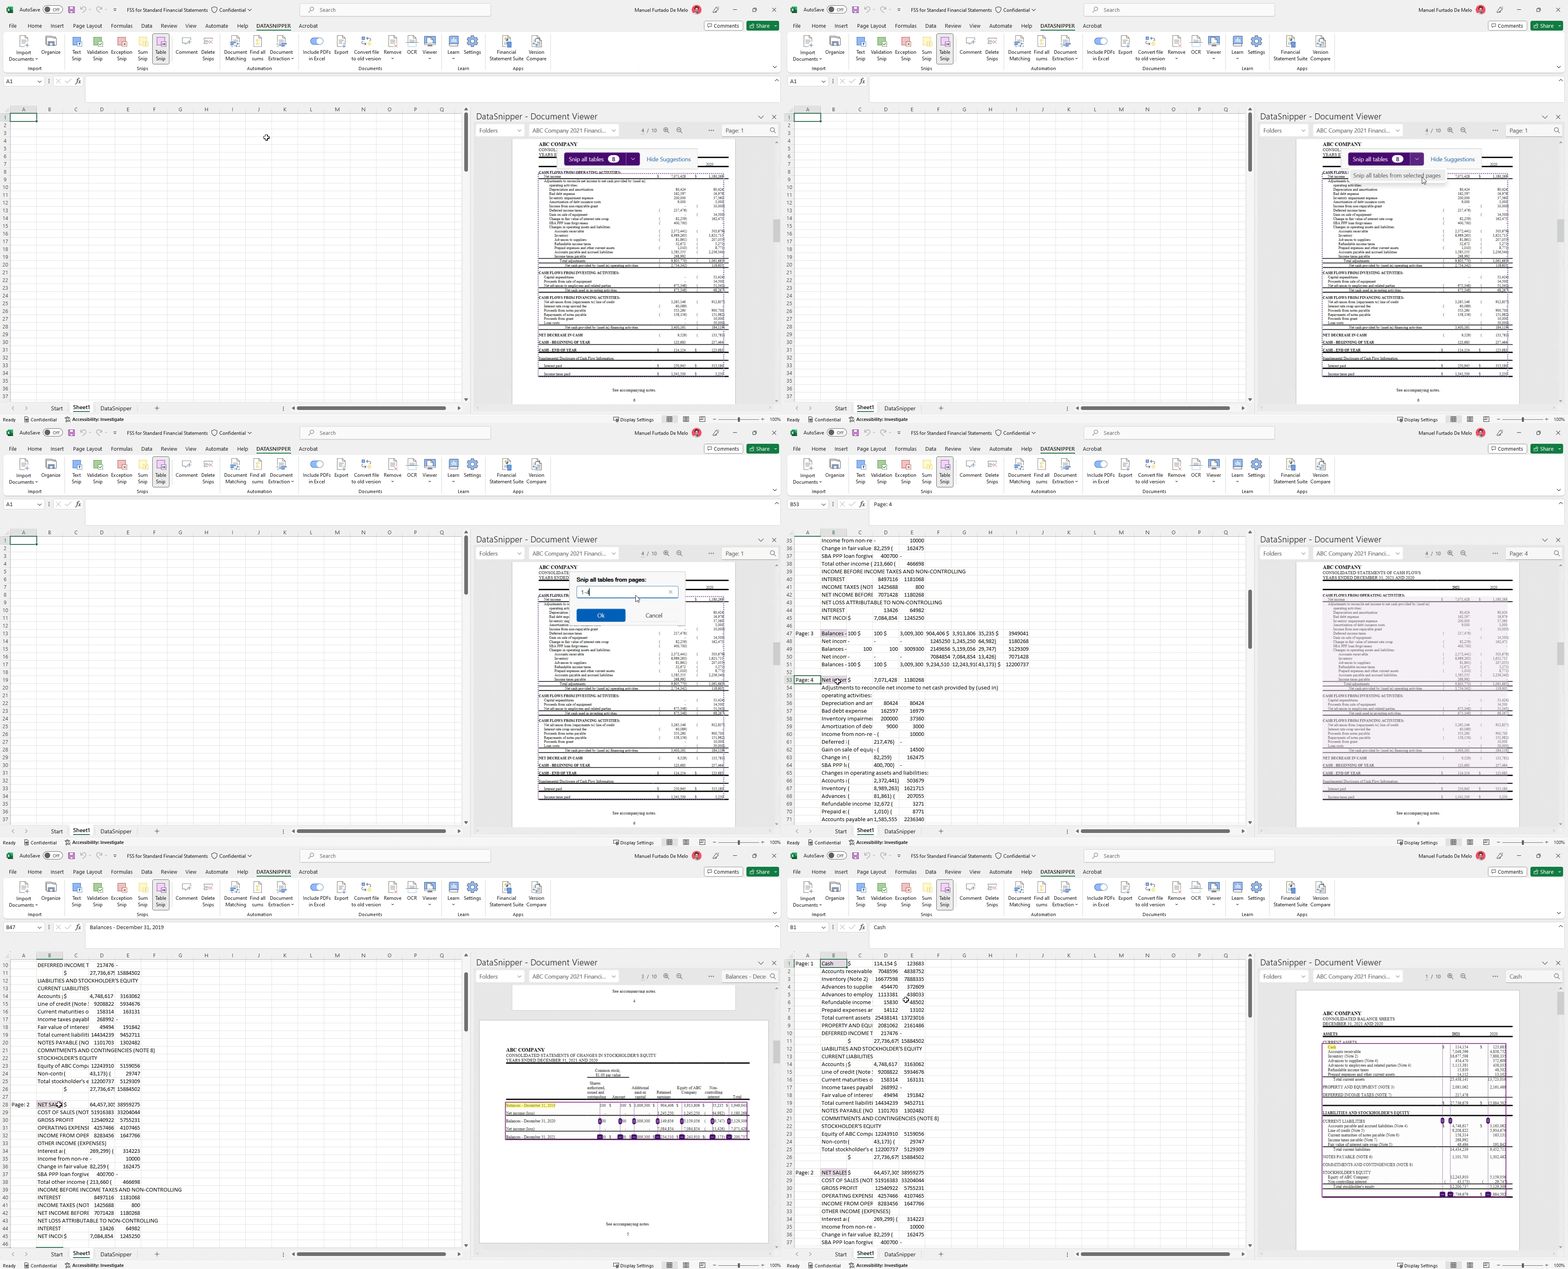
- Table Snip in Version 6.0 also allows you to select which pages you want tables to be automatically extracted from, by providing a pages range.
- With version 6.0, editing tables have also been made simpler with the ability to edit the Table Snip by dragging the columns and rows to the desired location without having to delete and reapply.
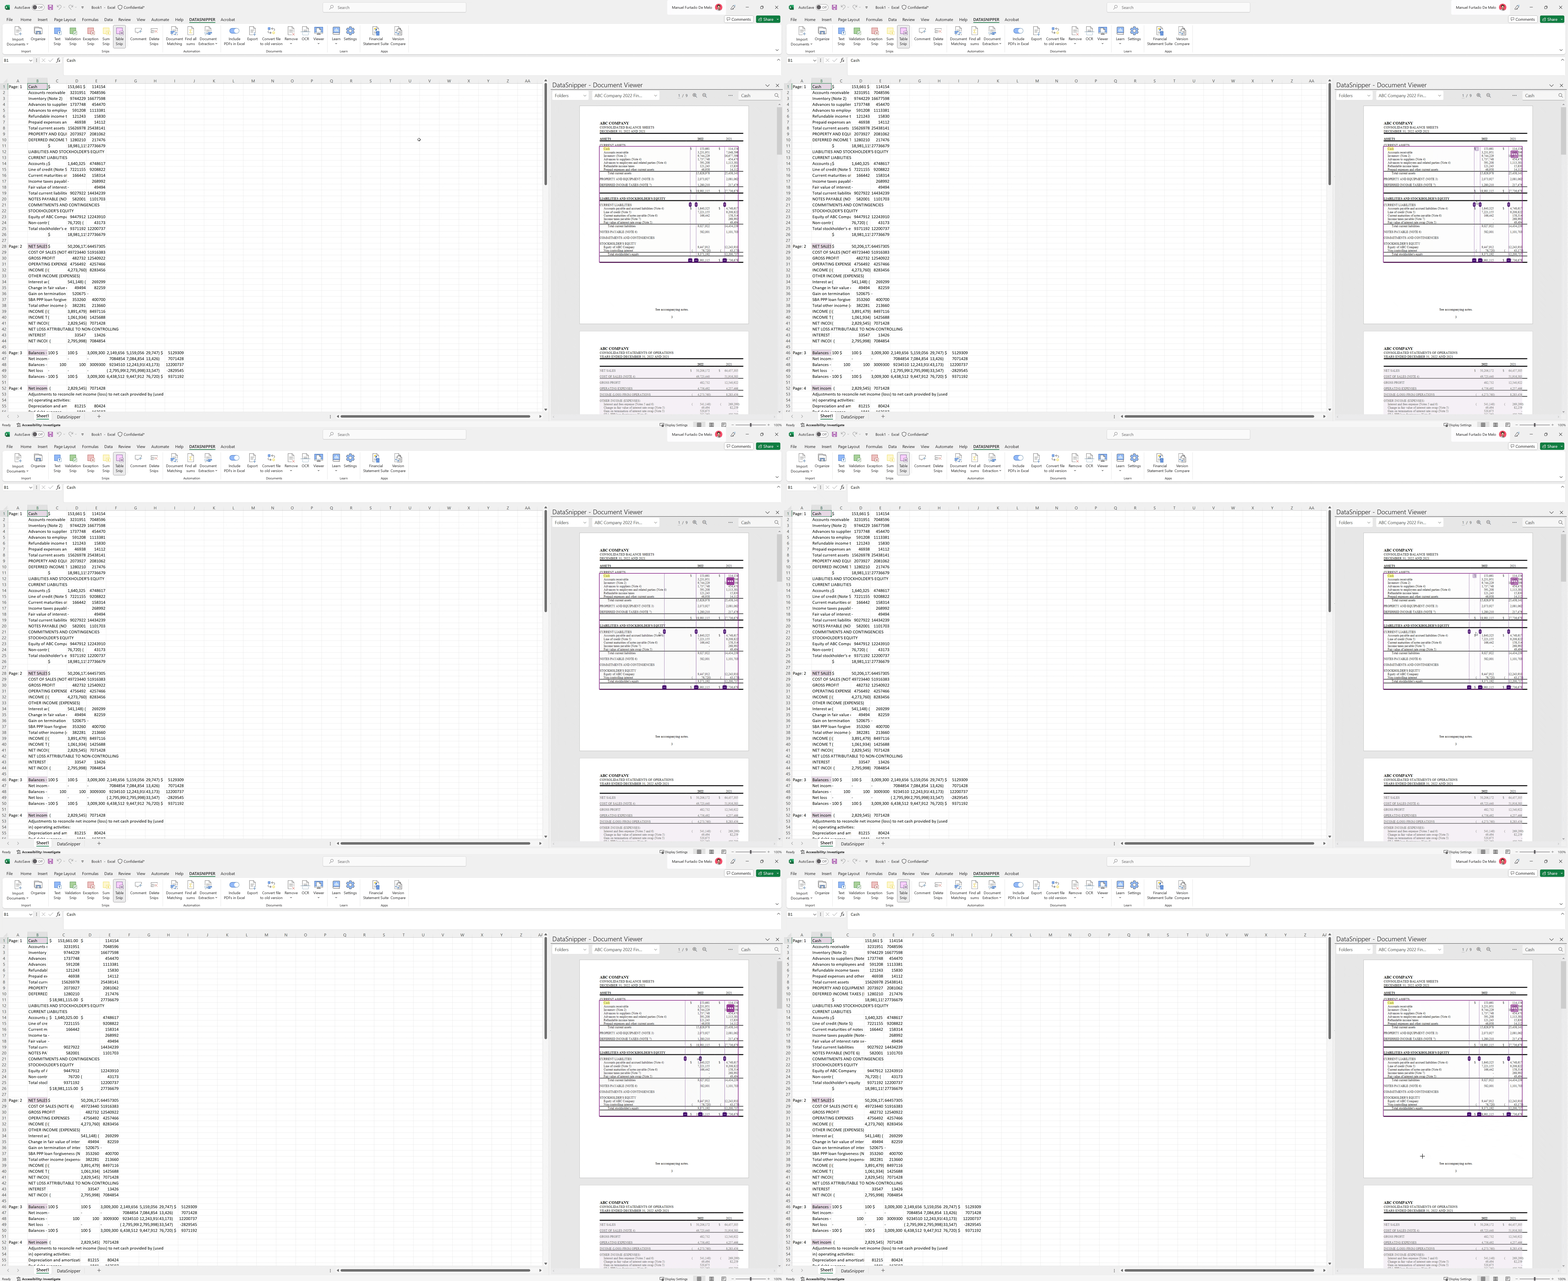
DataSnipper's Table Snip Version 6.0 can now capture all tables at once regardless of number of columns or rows and allows for edits of columns without deleting and reapply them.
DataSnipper version 4.1 and later
What's new in version 4.1?
In version 4.1, DataSnipper automatically provides suggestions to Table Snip when it detects tables in the documents. No need to drag and draw rectangles to snip tables. With a single click of a button, the tables are extracted into your Excel workbook.
Video Tutorial
Auto Table Snip
- Press the Table Snip button on the DataSnipper ribbon.
- Using the Document Viewer on the right-side, identify a table in your documents.
- You will see a blue rectangle around the table as a suggestion.
- Click on "Snip Table" and the table will be extracted into your Excel workbook.
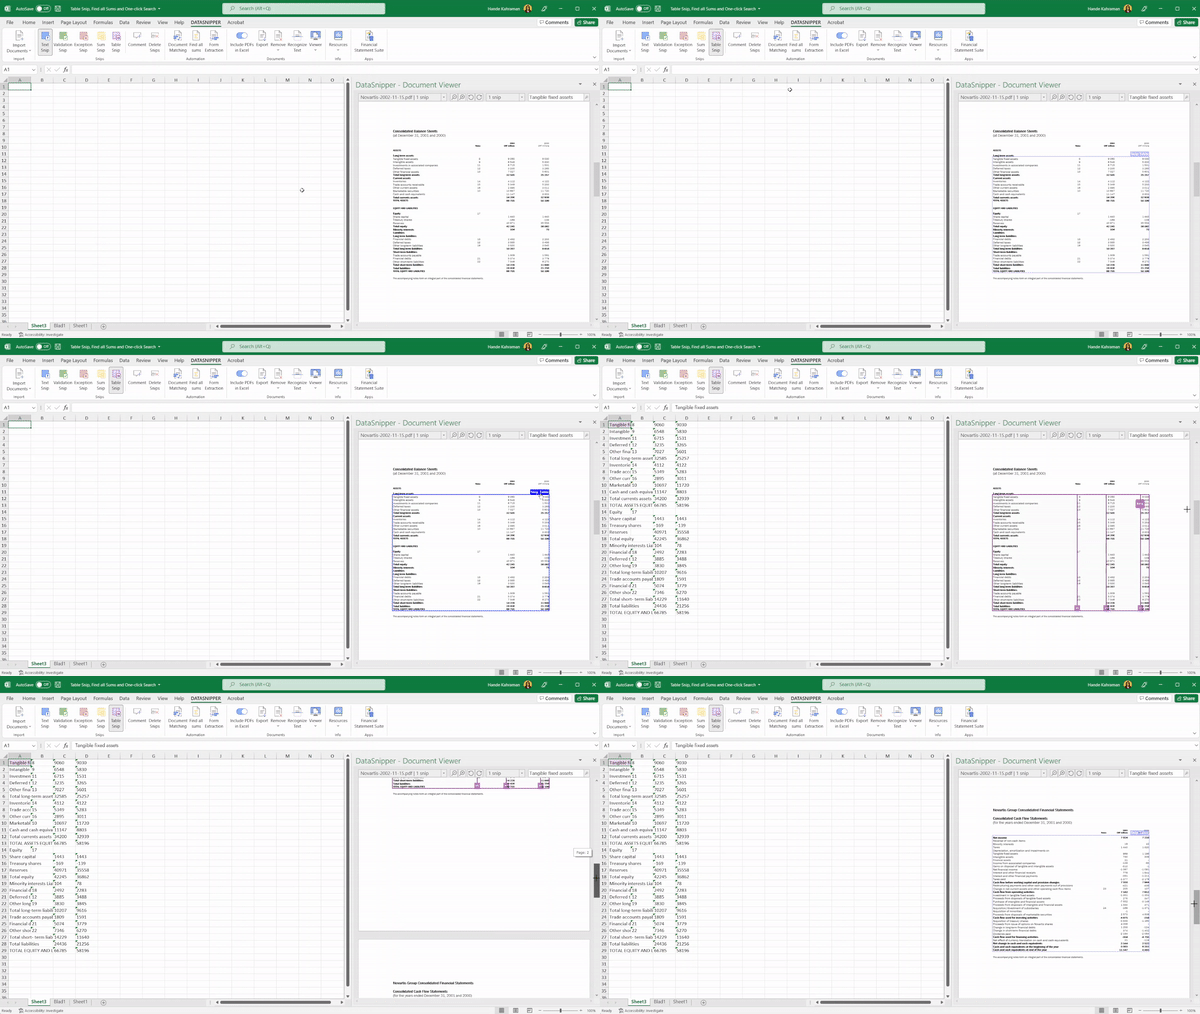
- After the placement of the Table Snip, you can adjust the table by stretching the edges.
- You can add columns by using the plus button or remove a column with the minus button.
- By clicking on options, you can edit rows. You can add rows by using the plus button or remove a row with the minus button.
💡 When you have large tables spanning over multiple pages, DataSnipper automatically detects it and repeats the table snip for other pages.
DataSnipper version 4.0
Video tutorial
Table Snip multiple pages
With the ‘Table Snip’, you can easily extract tabular data from PDFs into Excel. Multi-page table extraction allows you to analyze large PDF reports. Save time!
Let's start
- Draw a rectangle around the data (excluding headers) in the PDF, so your first Table snip is created.
- Then click the "...", you can choose on which pages it should create additional table snips for the same positions.
If you don't want to extract the header for every new page, don't select the header on the first table.
FAQs
- Does the repeat Table Snip option work when the size of the tables on the different pages is not consistent?
Yes, it works as long as the first table snip you create is big enough in order to capture the tables that may be bigger in the rest of the pages of the document. - If there is no header on a table I want to snip, will Table Snip still work?
You don't need a header to be able to snip the information that is in tabular format. DataSnipper will still recognize the table and you should be able to snip it using the Table Snip.
Additionally, in Version 4.1, the “Table Snip Suggestions” feature doesn’t take out table headings by default, therefore you should always snip headers of tables using a manual table snip once. - When repeating the Table Snip, the edited rows on your first table snip will not be applied on the table snips on the other pages as it will default to re-identifying the rows again. Is there a way to consistently apply the configured set-up on the repeated table snips?
This is not possible at the moment with versions V4.0 and V4.1. Even when you extract a suggested table group (which is a bit more advanced in its algorithm), editing columns is synchronized across the entire group, but that's not the case for rows.