How to use the WebSnip Extension
Learn how to use WebSnip Extension to capture evidence from web pages.
About WebSnip Extension
Seamlessly extract and validate data from web pages. WebSnip Extension increases the credibility of your evidence by capturing the URL and timestamp of your screenshot and syncing them directly to your Excel Desktop. By eliminating manual steps and third-party apps, you can now quickly import data, reduce the chance of human errors, and create consistency in data capturing and documentation from web pages.
Prerequisites
- DataSnipper version 6.0 or later
- DataSnipper or Private OCR
- Chrome or Edge Browser
Step-by-step Guide
Before you begin, ensure that the toggle "Sync Snips to Excel" is turned on.

- Open your Excel workbook on your desktop where you want the data to be extracted.
- Choose an empty cell where you'd like the data to be placed.
- Go to your web browser and navigate to the webpage containing the data you want.
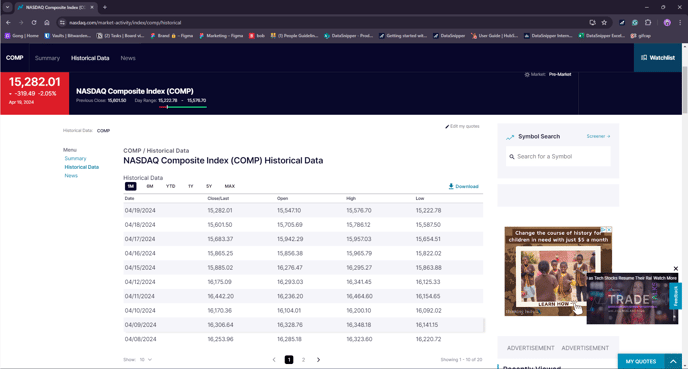
- Click on the WebSnip Extension icon in your ribbon. This will bring up the Snipping toolbar at the bottom of your screen.
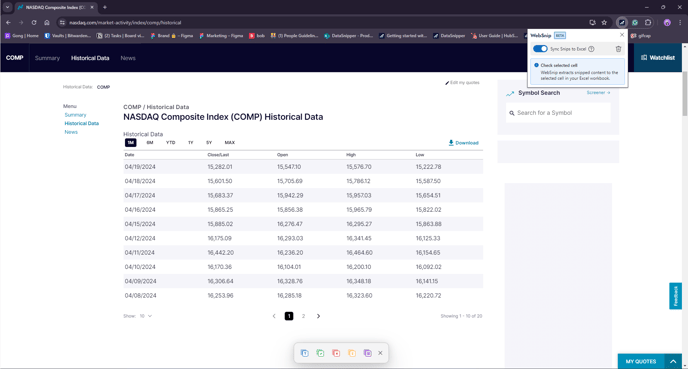
- You can select Text, Validation, Exception, Sum, or Table Snips to extract data.
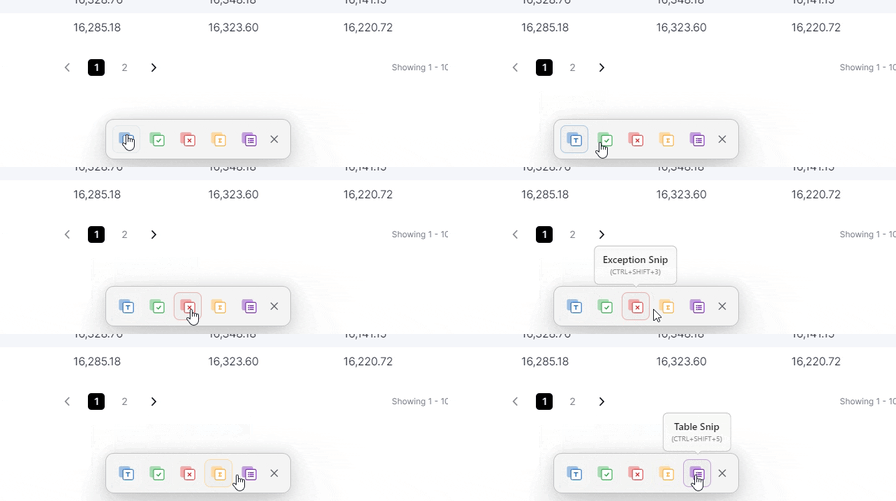
- You can select Text, Validation, Exception, Sum, or Table Snips to extract data.
- Use the Snipping toolbar to select the data you want to extract by drawing a rectangle around it.
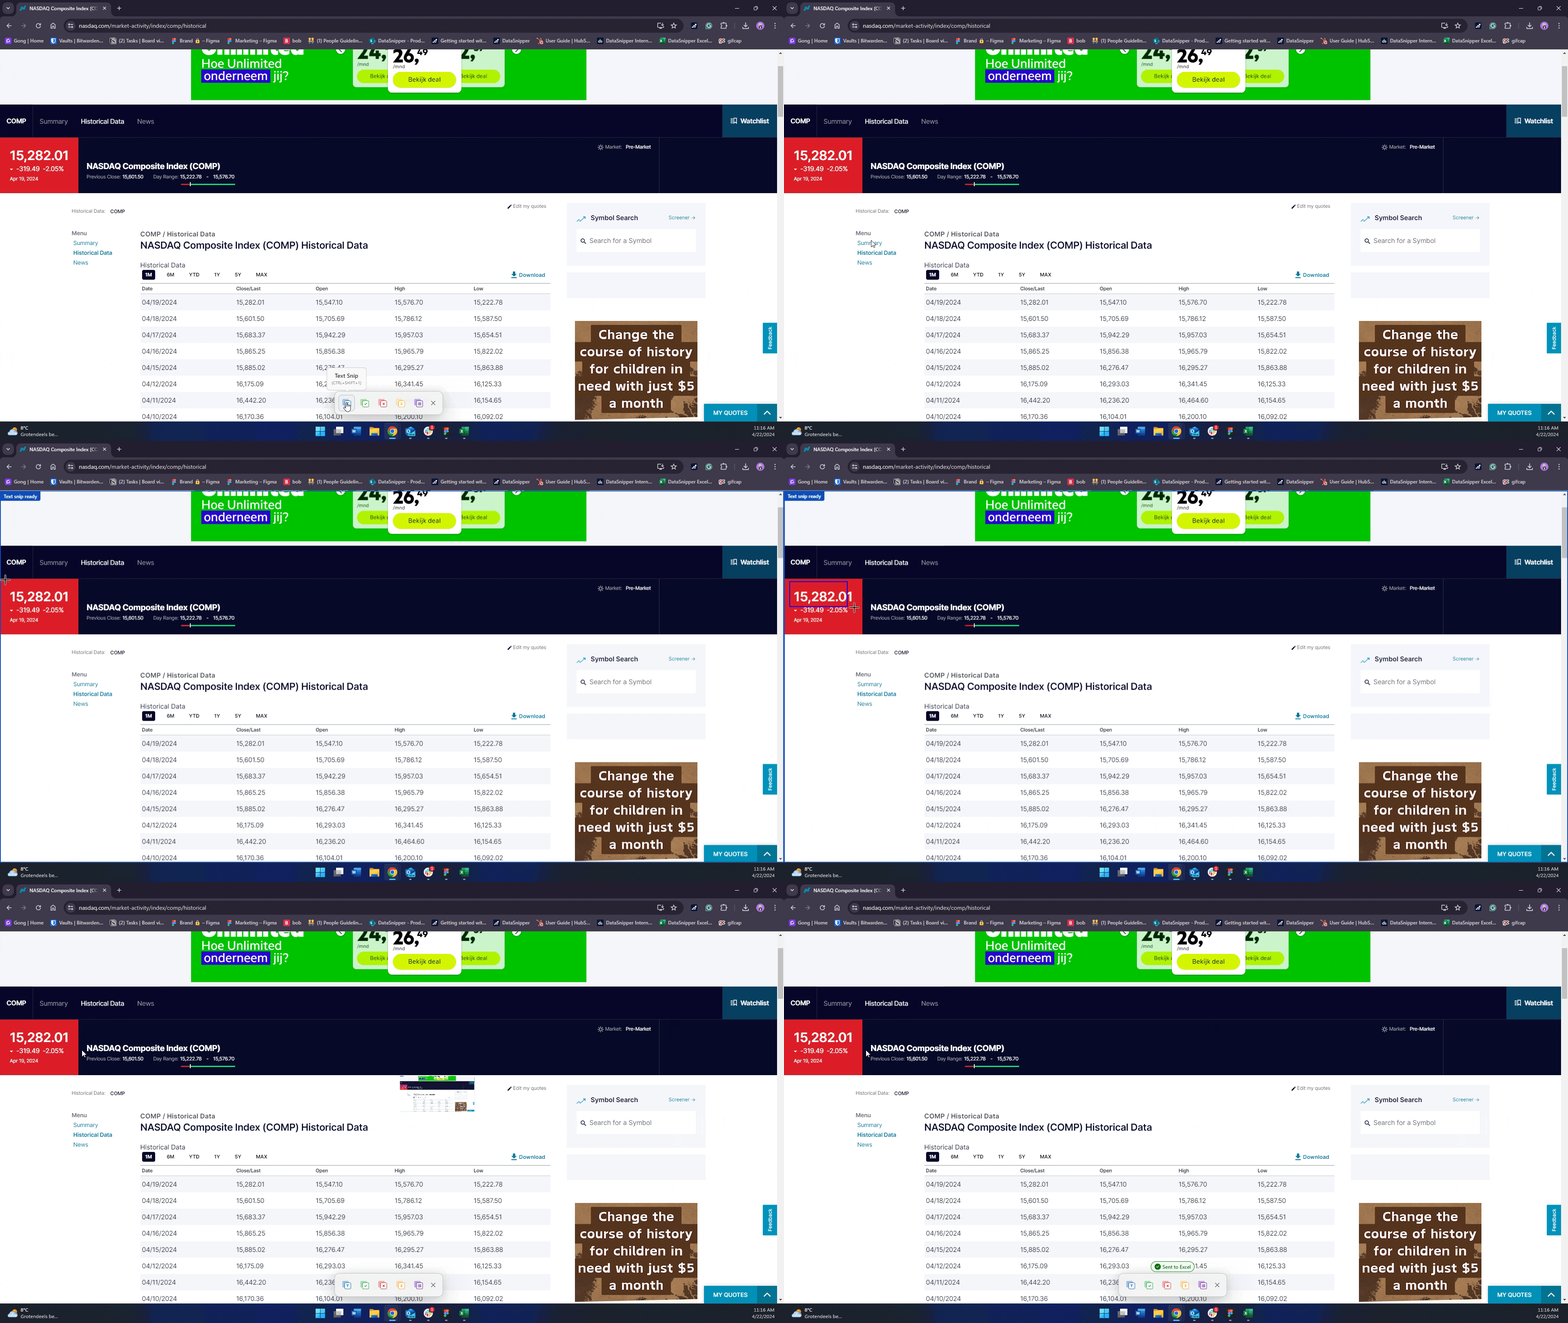
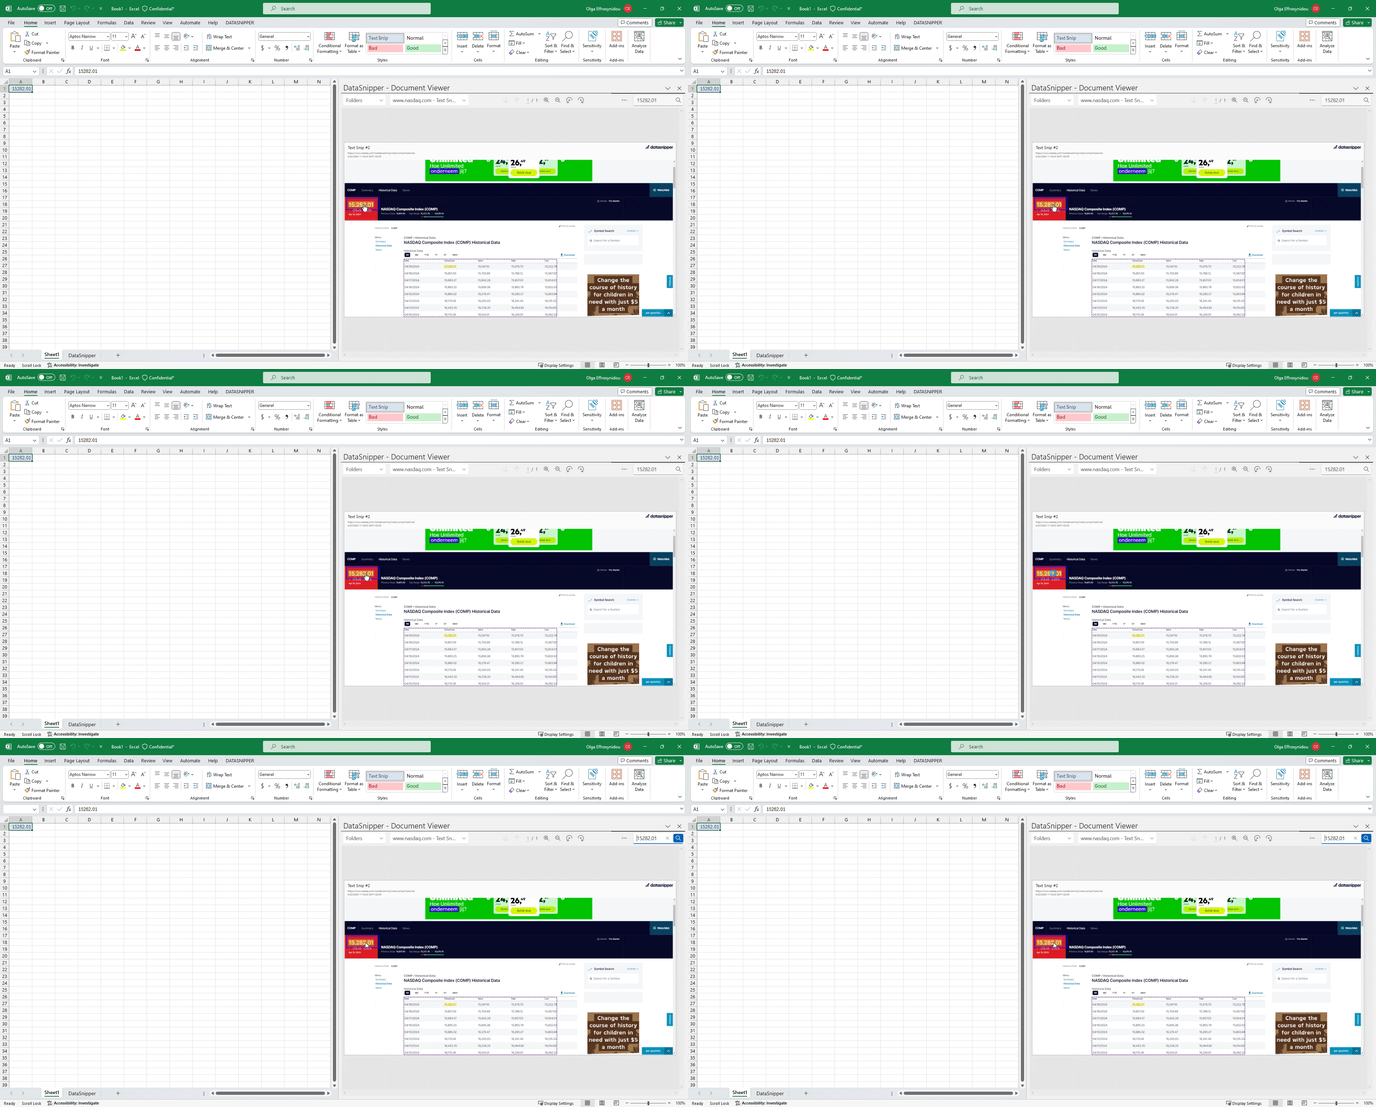
- WebSnip will automatically capture the selected data and transfer it directly to your Excel workbook.
- Return to your Excel workbook to view the extracted data in the chosen cell.
- The Document Viewer will display additional information, including a screenshot of the captured evidence, the URL of the webpage, the timestamp of the extraction.
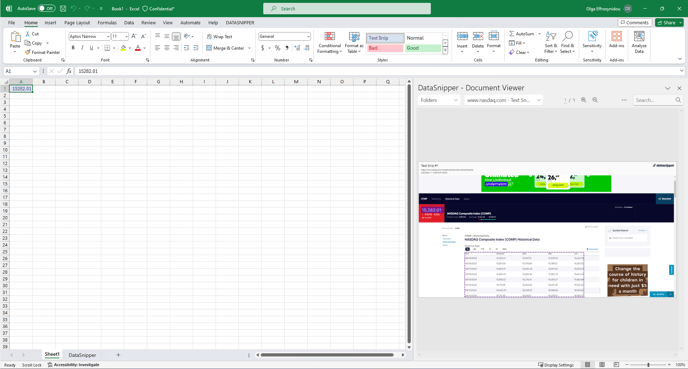
- The extracted data and source evidence are now cross-referenced in your Excel workbook on your desktop.
