About Receipt Extraction
With Receipt Extraction, you can automatically extract data from receipts such as Merchant Name, Totals, Transaction Date, and many more, regardless of the reciept's layout. Be less prone to errors with this advanced feature as it leverages OCR to recognize and extract data fields automatically. Simply check the data fields you need and DataSnipper automatically extracts relevant data directly to your Excel workbook and creates a reference to the source document.
Prerequisites
- Advanced Extraction Suite add-on module
- DataSnipper Version 6.0 or later
Start extracting
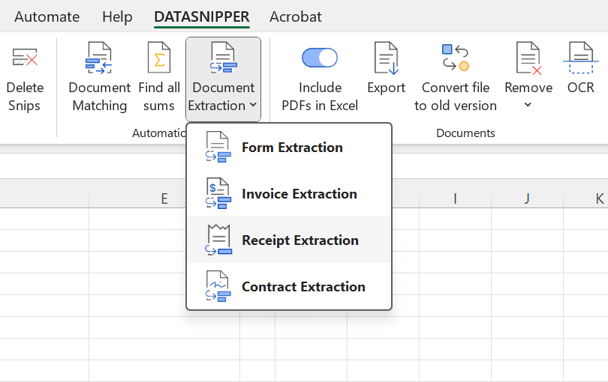
1. Open Receipt Extraction by clicking on the Document Extraction button in the automation section of the DataSnipper Ribbon and select Receipt Extraction on the drop-down menu.
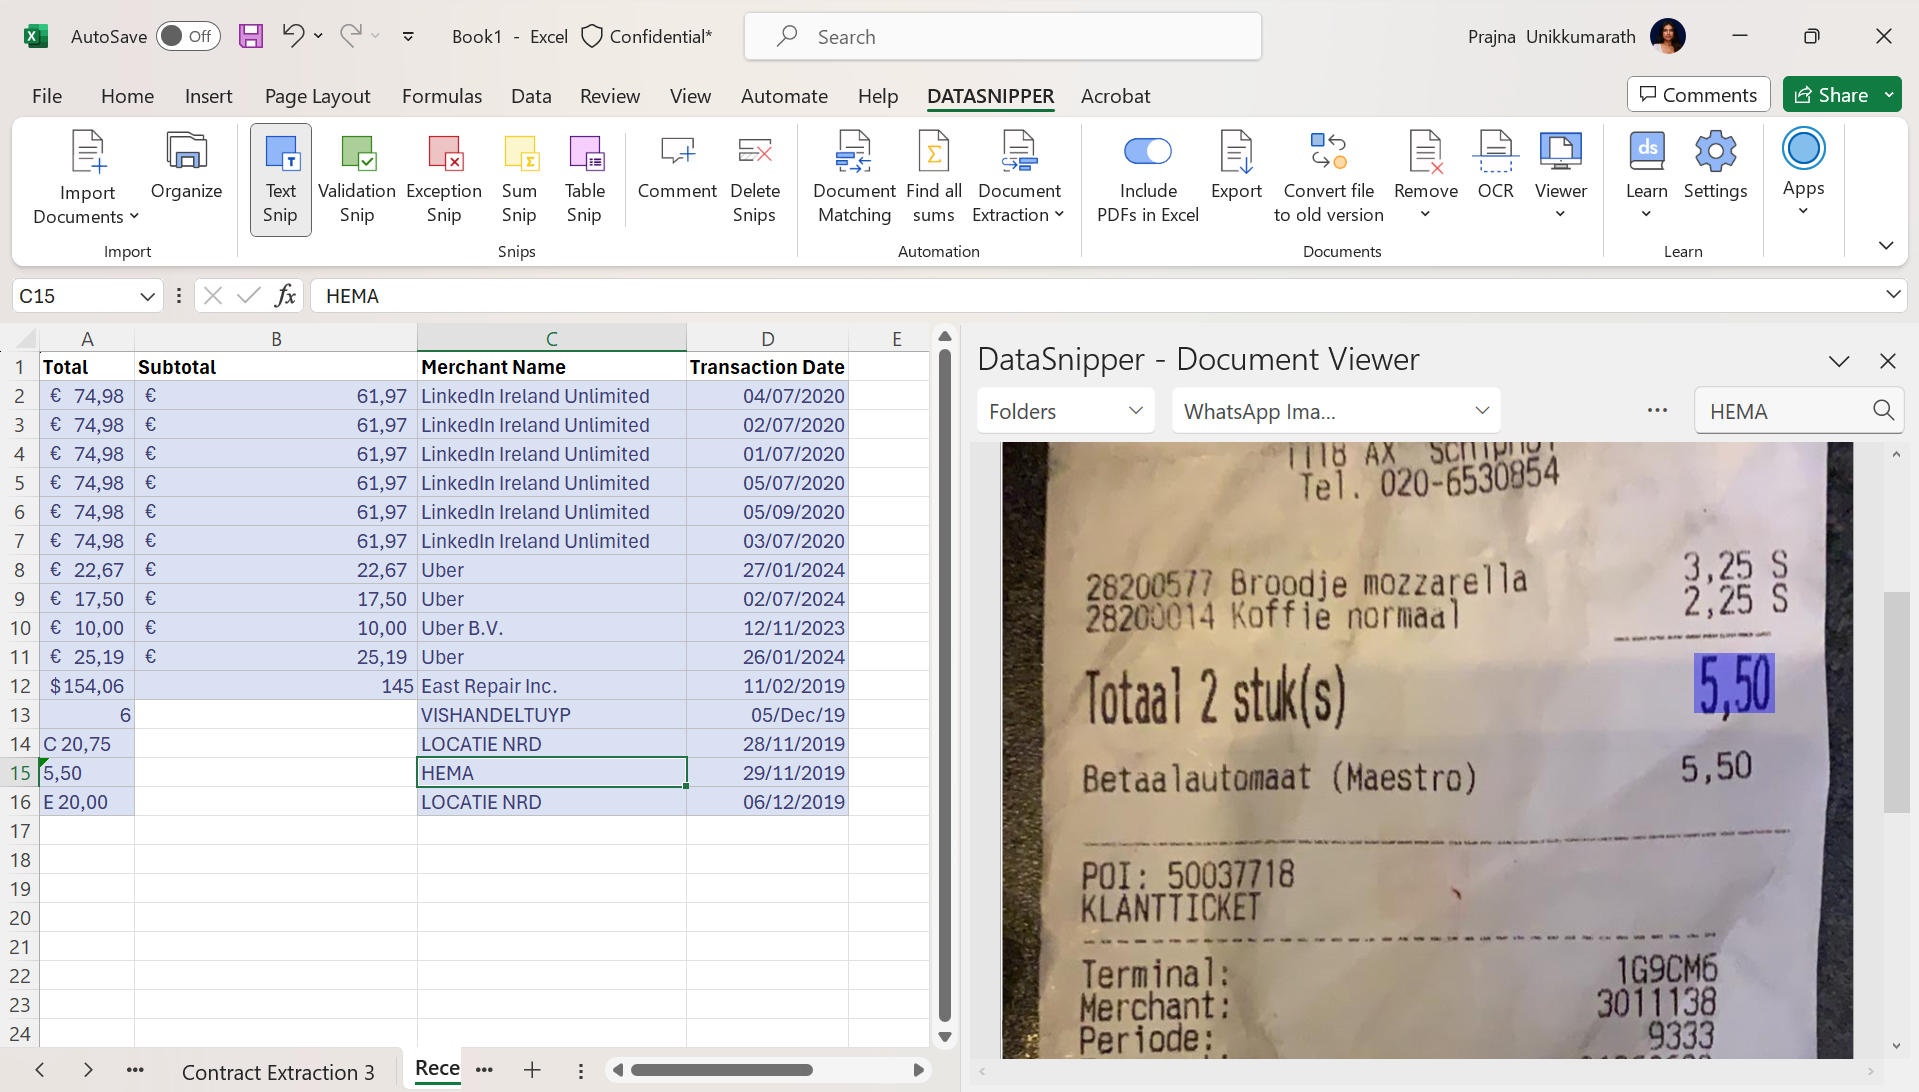
2. Once the Receipt Extraction section appears on your Document Viewer, select the receipts to which you want Receipt Extraction to be applied, as well as the fields for the relevant information you want to extract.
3. If you click the "Extract" button you will see the selected data in tabular form in your Excel workbook. By hovering over the Snips, you can see the cross-referenced receipt on the Document Viewer.
Clients with Private OCR
Clients with private OCR need to have access to “Azure AI Document Intelligence” to use Receipt Extraction. You can easily do that by creating an Azure AI Services Multi-Service Account.
Step-by-step Guide
- Log in to https://portal.azure.com/#home and click AI Azure Services | Azure AI services multi-service account
- Click on Create Azure AI services multi-service account
- Fill in the form and click Review + Create