Why Use Microsoft Intune?
Microsoft Intune is a cloud-based endpoint management solution. It manages user access and simplifies app and device management across your organization. It can be used in both corporate and BYOD instances and provides an accessible and automated way to deploy software for your organization.
Step-by-step Guide
1. Preparing the DataSnipper MSI for Intune Deployment
In order to deploy DataSnipper through Microsoft Intune, it will be necessary to prepare the MSI for deployment.
Third-party applications are usually considered as ‘Line of Business’ or LOB applications within Microsoft Intune. However, attempting to deploy DataSnipper as a LOB application through Intune can lead to unexpected permission issues on the client side.
To avoid these types of issues when deploying DataSnipper to your organization, it is important to package the installation file as a Win32 application. Before you can add a Win32 app to Microsoft Intune, you must prepare the app by using the Microsoft Win32 Content Prep Tool. You use the Microsoft Win32 Content Prep Tool to pre-process Windows classic (Win32) apps. The tool converts application installation files into .intunewin format which can then be deployed through Microsoft Intune.
You can download the Microsoft Win32 Content Prep tool from the official GitHub repository here: https://github.com/Microsoft/Microsoft-Win32-Content-Prep-Tool
Win32 Content Prep Tool is downloaded as a zip file. Extract this and then run the IntuneWinAppUtil.exe.
The program will ask you to input some required information:
- Source Folder: the directory where the DataSnipper MSI is located
- Setup File: Name of the setup file. For DataSnipper this is ‘Setup.msi’ before V6, with V6 it will be V6.x.x.msi (The numbers replace the X)
- Output Folder: Where you would like the .intunewin file to be stored

It is not necessary to specify a catalog folder, and you can simply press N and enter:

Once the process is complete, you will find ‘Setup.intunewin’ in the previously defined output folder:

This installation file is now ready to be uploaded to the Microsoft Endpoint Manager admin center. The next section will go over in detail how to deploy this installation to your organization via Microsoft Intune.
2. Deploying DataSnipper Through Intune
After you have packaged your Win32 application, the next step is to deploy it to your organization. It can be deployed to an already created security group, or else you will need to create a new security group within the Microsoft Endpoint Manager admin center.
Information on how to create security groups within Azure AD is beyond the scope of this article. However, you can find more information on this here: https://learn.microsoft.com/en-us/azure/active-directory/roles/groups-create-eligible
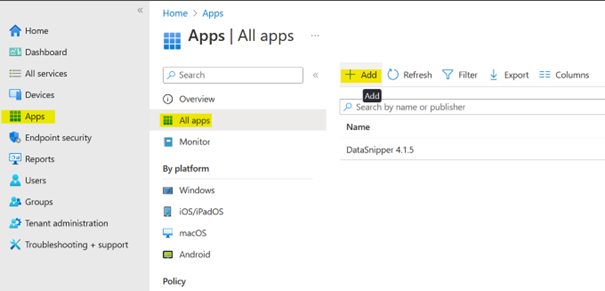
In order to upload the packaged installation file to Azure AD, click the ‘Apps’ button on the left pane, then ‘All apps’ and finally ‘Add’:
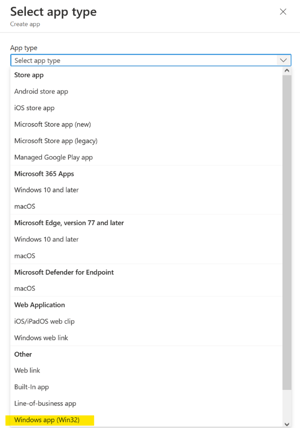
Next, select the app type from the drop-down menu on the right side and then click ‘Select’ at the bottom of the page. Make sure to select app type ‘Windows app (Win32)’.
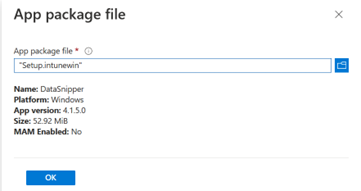
On the next page, click on ‘Select app package file’, it will open a pane on the right side where you can browse to select the Setup.intunewin package we created earlier. Afterwards, click ‘OK’.
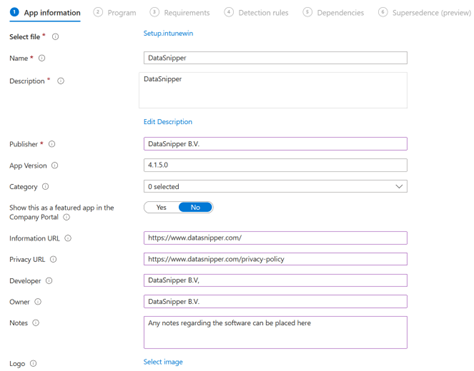
On the next screen, you will need to fill out information about the application being uploaded. The image below provides a reference for how to fill out this information. Please note that the option to ‘Show this as a featured app in the Company Portal’ is optional, and will depend on how you intend to manage your organization’s applications.
In the program section, you need to input your installation and uninstall command. Also make sure that Install behavior is set to System to avoid any permission errors client-side.
-png-1.png?width=816&height=647&name=image%20(5)-png-1.png)
Your install command should be in the following format:
msiexec /I “v25.1.7.msi” /qn
Note: Replace "v25.1.7.msi" with the correct .msi file name or version number.
The ‘/qn’ argument is optional and can be used to push a silent installation of DataSnipper.
After you have entered the required information on this page, click Next at the bottom of the page to continue.
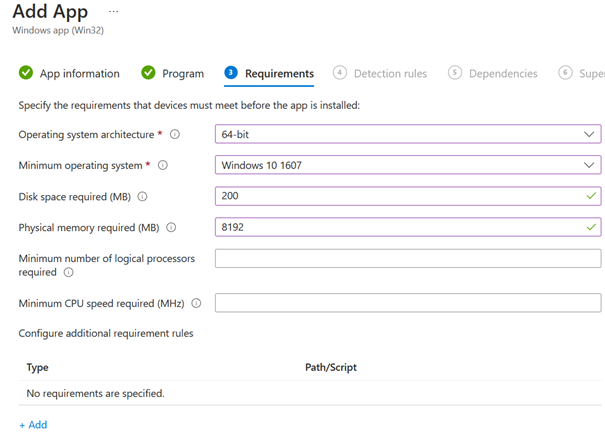
On the ‘Requirements’ tab, you will need to input the system requirements necessary to have DataSnipper deployed to the device(s) in question. In the image below, we have inputted the recommended system requirements for DataSnipper. Please note that DataSnipper will run on machines with lower specs, however, these specs are highly recommended for a smooth experience. After filling out the necessary fields, click next.
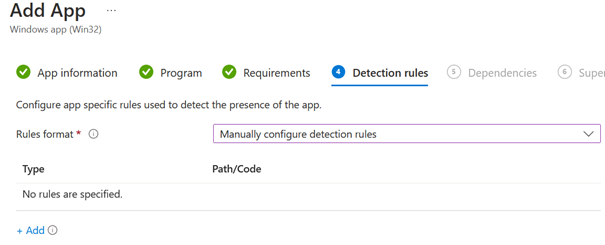
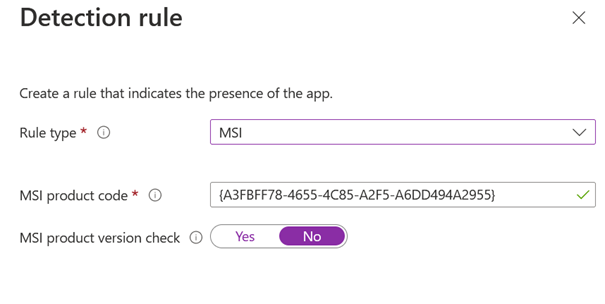
The next section is concerning detection rules, which are rules to determine whether a program is already installed on the target machine or not. Select ‘Manually configure detection rules’ for the Rules format, choosing an MSI rule type and leaving the other fields default. The MSI product code will be populated automatically by Intune as it reads the MSI we uploaded.
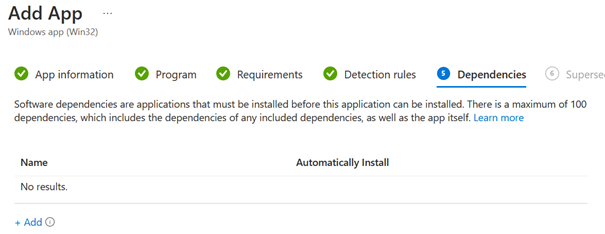
The next section is concerning software dependencies for your application. DataSnipper depends on a couple of software packages in order to function. All users will need to have Visual Studio Tools For Office Runtime 2010 and .NET Framework 4.7+ installed on their machines in order to function. These can optionally be configured here, in DataSnipper v5+, these dependencies are automatically installed with DataSnipper.
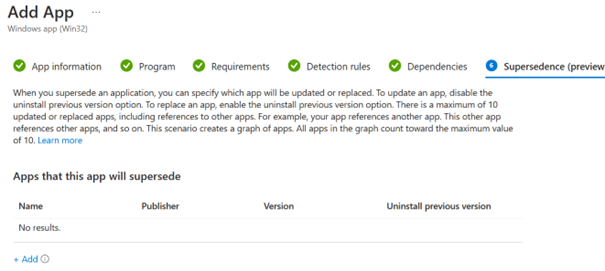
The penultimate section is concerning supersedence. Here you can select apps that the current app being installed will supersede (replace). You may want to include the previous version of DataSnipper used in your organization here. If this is your first time installing DataSnipper for your organization, you can leave this section blank and click next at the bottom left of the screen.
The final section is focused on assignments. Here is where you can determine which user groups this application will be pushed to within your organization. It is important to configure your security group before assigning.
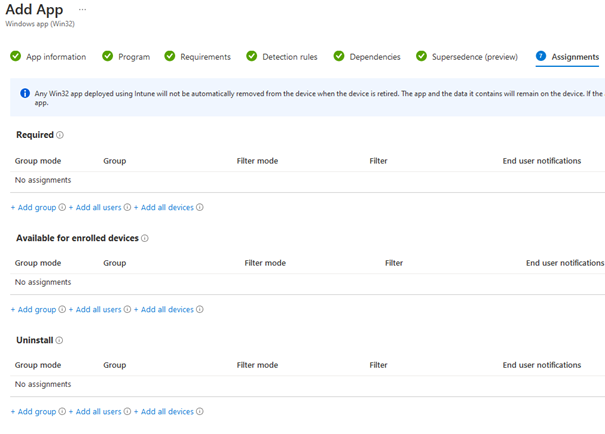
There are three availability options you can select for your security groups. ‘Required’, ‘Available for enrolled devices’, and ‘Uninstall’. Required means that the application will be automatically installed on the user machines. Available for enrolled devices means that the application will be available for download and installation from the Company Portal application for users in the group. Finally, Uninstall means that for any users in the group who have this application installed, it will be uninstalled.
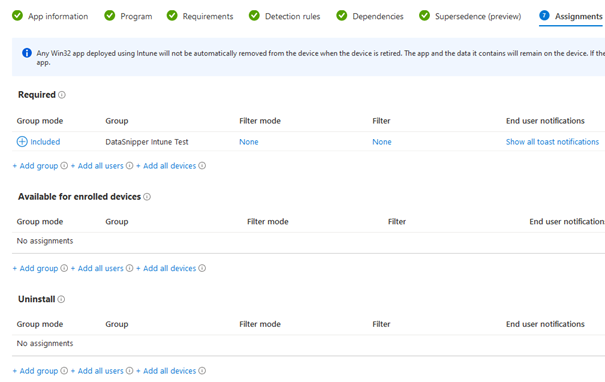
In the image below, I have added DataSnipper Intune Test group to the ‘Required’ section. All users in this group will have DataSnipper installed on their machines the next time these machines synchronize with Microsoft Intune.
Once all groups have been configured on this page, click next to review and create your application.
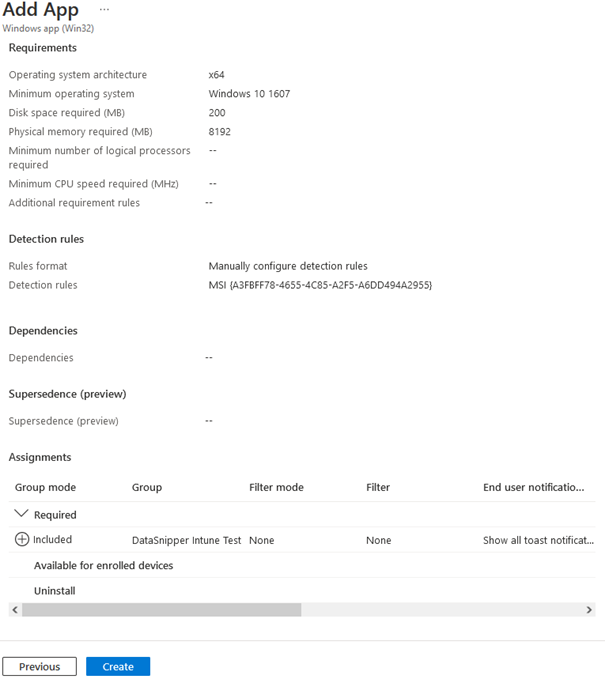
The final section allows you to review all of the information you have filled out in the previous section. Carefully review this information, and once everything checks out, simply click the ‘Create’ button to create your application. Once this is completed, any machines in the configured groups will have the application installed on their machine.
3. Further information
For further information on the deployment of applications through Microsoft Intune, we recommend visiting Microsoft’s official documentation on this topic. It can be found here:
https://learn.microsoft.com/en-us/mem/intune/apps/apps-windows-10-app-deploy